Showing posts with label mixed media. Show all posts

Wednesday, November 15, 2017

Want2Scrap Mixed Media Journey Card

Hello Want2Scrap friends, it is Linda here, thank you for stopping by. Today I have a Mixed Media card to share with you, created using an eclectic mix of products including Chipboard, Washi Tape and Border Bling.  You can see how it all comes together below.


I have started with a pre-cut card base and some negative Die cuts from the Seth Apter Trifecta Etched Dies as my card front.  A Small Strip of both the Toffee and the Blue Washi Tapes have been added to the top corners and the card front is layered onto white card stock but slightly larger and adhered to the card front using double sided tape.


The Owl is one of my handmade embellishments using Paper Clay and coloured using Chameleon PensIt has been adhered to the centre of the negative dies using Beacon Adhesives Zip Dry.


BEAUTIFUL BLING BORDERS BY NINA BRACKETT - CHEVRON  have been added  below the owl and one strip along the lower edge of  the card front.  The Border comes in individual strips and are easy to use separately or create rows of them.  Three co-ordinating feathers from the Die D-Lites Two Feathers Etched Dies have been cut/embossed and lightly sanded.  These have then been tied with fine twine at the top and adhered using Scrapbook Adhesives BY 3L 3D Foam Squares.  Small beads from my stash have been added to the ends of the twine.


The Journey - Fancy Chipboard has been coloured using  Chameleon Pens, I have coloured it three time to give the depth of colour and then added a coat of Imagine irRESISTibles Pico Embellisher in Electric Yellow.  Once this has dried it has been adhered to the top of the card using Beacon Adhesives Zip Dry.

Random splatters of the Pico Embellisher in Electric Yellow have been added to the card front, along with light splashes of white paint.

Other: 
Spellbinders:S2-270 Die D-Lites Two Feathers Etched Dies' S4-740 Shapeabilities Seth Apter Trifecta Etched Dies;  Scrapbook Adhesives BY 3L: E-Z Dots Permanent Refillable Dispenser, 3D Foam Squares; Beacon Adhesive: Zip Dry Liquid Glue; Chameleon Pens; Imagine irRESISTibles Pico Embellisher in Electric Yellow.

Thanks so much for stopping by and the lovely comments you leave - they are appreciated.  I hope you are inspired to 
.
I would love you to visit me on my Blog: Lovely Linda's Craft Central

{{{Hugs}}} and Happy Creating


Tuesday, January 3, 2017

Under the Sea with Heartfelt Creations and Want2Scrap

Hello and welcome!  Susie here today with a quick all occasion card I created with a stamp from Heartfelt Creations and Want2Scrap bling!
I don't have a lot of patience for detailed coloring but that doesn't keep me from using a beautifully detailed stamp. The Under the Sea stamp set has 5 whimsical sea creatures with the most amazing details!
I created a wash of orange and yellow on watercolor paper with Color Burst and then I stamped and die cut some of the little fishies.

One of my favorite things about Heartfelt Creations stamps is that they frequently come with dies that match. It makes it quick and easy to isolate an image and then pop it up off the background for a huge impact.  Here I used dimensional adhesive to add one of the fish on top of an Ultramarine Blue Color Burst background.
I mounted that whole element on black cardstock and then lined the top and bottom with a strip of washi tape from my stash.  The final touch was a double layer of Sleek Strip Rhinestones in 2 colors and sizes - black and turquoise.

Want2Scrap Supplies for Under the Sea Card:

Cross Promotional Supplies:
Other supplies:  Ken Oliver Crafts Color Burst - Ultramarine Blue, Lemon Yellow, Orange; watercolor paper,cardstock, dimensional adhesive, ink, embossing powder, washi tape

 Thanks for stopping by and I hope you find some time to play today!  Susie

Monday, December 19, 2016

Want2Scrap and Peachy Keen - Mixed Media Card

Hello and welcome!  Susie here today with a mixed media card featuring a stamp from Peachy Keen and Want2Scrap bling!
I created the background with Ken Oliver Color Bursts on watercolor paper.  I trimmed it down and inked the edges before mounting it on cardstock.
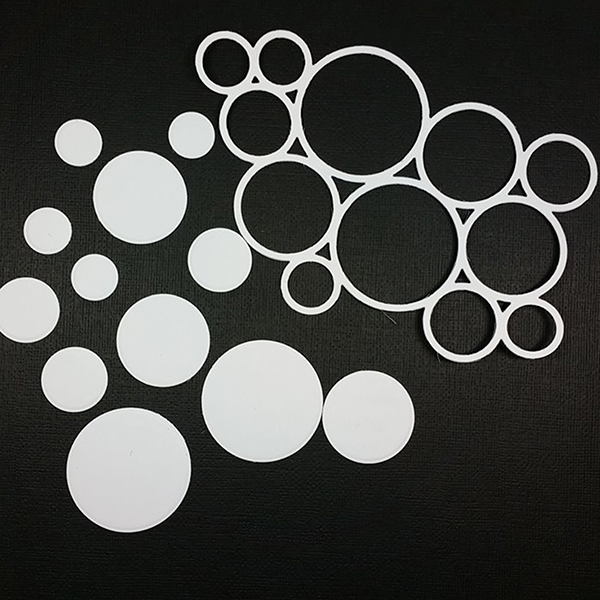
I used Spellbinders Cascading Circles die to cut white cardstock.
 

I used a stamp from the Peachy Keen In the Garden 1-1/8" Face Set to stamp on vellum with permanent black ink.  I colored the eyes from the backside with a sky blue marker.

I wanted to adhere the face behind one of the holes in the die cut so I trimmed the vellum down and added Zip Dry glue to the backside of the die cut.

I also used Zip Dry to adhere the entire die cut onto the Color Burst background.  Heres a close up of the stamped face on the card.

I pulled out Nina Brackett's Let It Snow bling and chose a snowflake for the upper right of the card.

Want2Scrap Supplies for Snowflake Card:

 Cross Promotional Supplies:
Other Supplies:  Ken Oliver Crafts Color Burst - Ultramarine Blue, Lime Green, Turquoise; Dymo Labelmaker; watercolor paper, inks, marker

Thanks for stopping by and I hope you find some time to play today!  Susie

Friday, December 16, 2016

Heartfelt Creations and Want2Scrap - Under the Sea

Hello and welcome!  Susie here today with a mixed media card pairing the Heartfelt Creations Under the Sea stamp set with Want2Scrap rhinestone bling! I adore anything to do with the ocean so I loved playing with the whimsical images in the Under the Sea stamp set from Heartfelt Creations.  One of my favorite thing about them is that they have coordinating dies!  Die cutting the images is so much faster than having to fussy cut them!
I started by creating a mixed media background on water color paper.  When it dried I stamped the seahorse image with permanent black ink.  Using the coordinating die, I cut and embossed the  seahorse.
In order to really emphasize the eye, I added a 2.5mm black rhinestone from my pack of Want2Scrap Baby Bling.
I created a background on white cardstock with inks, a stencil and embossing powder.   I achieved a little bit of "grunge" before I stamped a sentiment and adhered the seahorse.
I sprinkled the card with Irridescent, Turquoise and Light Green rhinestones in 3 different sizes to finish things off!
It is so easy to create beautiful cards with Heartfelt Creations and Want2Scrap!

Want2Scrap Supplies for Under the Sea Card:

Cross Promotional Supplies:
Other supplies:  Ken Oliver Crafts Color Burst - Ultramarine Blue, Lime Green; Ken Oliver Crafts Liquid Metals - Verdi Gris; The Crafters Workshop stencil - Mini Raven Mosaic; Wow Embossing Powder - Atlantic Seaspray; Impression Obsession/Yvonne Blair Words for Art cling stamps, watercolor paper, inks.

Thanks for stopping by and I hope you find some time to play today!  Susie

Wednesday, December 14, 2016

Baby It's Cold Outside So Bling It Up


Hello Everyone, Terre here with a couple of mixed media projects, the first one is a simple card using Imagine Crafts Creative Medium. I used a pallet knife to spread this all over the card front, then heat set it to make it bubble and add dimension. Die cut some Spellbinders snowflakes and what did I embellish them with? Hello.....Want2Scrap© 72 Count Rhinestone Bling!

My second project is an upcycled project, I used a brown glass bottle, covered it in Imagine Craft Amplify and heat set it to make it bubble to reflect snow. I die cut Spellbinders snowflakes and yes you guessed it....embellished the snowy bottle with Want2Scrap© 72 Count Rhinestone Bling.

Thank you all for joining me today for this mixed media/upcycled post, I hope you enjoy your week and make sure to leave us a comment or two and follow us on Facebook!

Crafty Smiles,


Wednesday, June 15, 2016

Mixed Media Canvas Blooms with Bling!

Susie here today with another mixed media canvas that is blooming with Want2Scrap bling!


I created the background on my mini canvas using Violet and Ultramarine Blue Color Bursts pigment powder.  I started by misting the canvas with water then I tapped out a tiny bit of each powder.   As the color started to develop I tilted the canvas back and forth.  I also used a wet paintbrush to move the water color around a little bit.  I even had fun with my heat gun, blowing the color around a bit more before finally drying the canvas.

I used an adhesive alpha to add the word "bloom".

Using a baby wipe, I gently patted the area over and around the letter stickers, removing a layer of color.

When I peeled the letters off, the darker original color reveals the word.

Next I applied purple ink through the Mosaic stencil from Rebecca Baer Designs.

Love the result!!  Now it is ready  for some pictures and embellishments!

As I was working on this canvas, I found that I used way too much water and Color Burst color!  I used a paper towel to wipe the excess up off of my craft mat and quite frankly I decided all of that gorgeous color was to good to waste!

I cut out lots of flowers so I could layer them together and then added an 8mm Orange Rhinestone in the center!

The final touch is a small piece of the Fancy That Bling Border!

Materials for Bloom Mixed Media Mini - Canvas with bling:

Thanks for stopping by and I hope you find some time to play today!  Susie


Wednesday, May 25, 2016

Bling On the Canvas!

Susie here today sharing another mixed media canvas featuring Want2Scrap bling!
I started my canvas with an Ultramarine Blue Color Burst watercolor background.  The cute little umbrella image is from the Sparkle N Sprinkle Splish Splash stamp set.  I heat embossed the image with Black Opaque Embossing Powder.
Next I wanted to try something a little different.  I used clear embossing ink and stamped the "Splish Splash" sentiment all over the canvas.  I sprinkled Waterscape Semi-Transparent glitter on the canvas and was pleased to find that it stuck to the canvas!
I wish I could tell you my experiment was a success...but I can't.  I knew I needed to secure the glitter somehow.  First I tried Workable Fixative.  It kept the glitter from falling off but was not a permanent solution as you could brush the glitter off.  Next I tried Acrylic Sealer Spray and it did not work either.  I ended up brushing off as much glitter as I could and then re-stamping and heat embossing with the Platinum Embossing Powder. I heat embossed the sentiment across the bottom of the canvas in Black Opaque Embossing Powder and then I reached for my bling!

Want2Scrap Teardrop Bling looks so cute sprinkled all over this canvas like raindrops!

Want2Scrap Supplies:

Cross-Promotional Partner Supplies:
Other Supplies:  Ultramarine Blue Color Burst, Clear Embossing Ink Pad, 4x4 Canvas


Thanks for stopping by and I hope you find some time to play today!  Susie


Monday, May 23, 2016

Want2Scrap's Rainbow of Bling!

Hello!  Susie hosting the blog today and I am sharing a mixed media canvas that features a rainbow of Want2Scrap bling!


I started by creating a water color pallet with 5 bright shades of Color Bursts.


I free handed a simple arch shape from the upper right of the canvas to the lower left.  I started at the bottom with purple, letting each color dry before I added the next band.


The Design Team recently had an opportunity to choose some products from Sparkle N Sprinkle, one of our Cross Promotional Partners.  I fell in love with the silhouetted images and sentiments on the Splish Splash Rubber Stamp set!  I stamped and heat embossed one of the images and a sentiment with Black Opaque Embossing Powder.


I collected coordinating colors of bling for each color band of the rainbow.  I didn't actually have yellow in my stash, so I substituted with the Irridescent Rhinestones (which I think are my favorite anyway!)  I chose the 3mm size from each of the packages.  The fact that the bling is self-adhesive made it really easy to accent a portion of each color band with approximately 10 gems!

Want2Scrap Supplies for Rainbow Canvas:

Cross Promotional Partner Supplies:
Other Supplies:  Ken Oliver Color Burst, 4x4 canvas


Thanks for stopping by and I hope you find some time to play today!  Susie

LinkWithin

Related Posts with Thumbnails
Pin It button on image hover