Wednesday, November 29, 2017

God's Blessing on Earth Layout

Hello Want2Scrap friends, it is Linda here on the Blog and I am excited to be sharing another layout with you today - created using one of the 12x12 Overlays - I cannot emphasise enough how easy they make scrapbooking - definitely a great way to find your starting place!


My layout today is inspired by one of the things my beautiful Nana wanted me to remember in life...

'Family is God's blessing on earth - Isla Labone


I have used various Alpha Stickers to create my sentiment around the title of the overlay.  Glitter Washi Tape - Toffee has been added under the stickers and a little more sentiment has been added. 

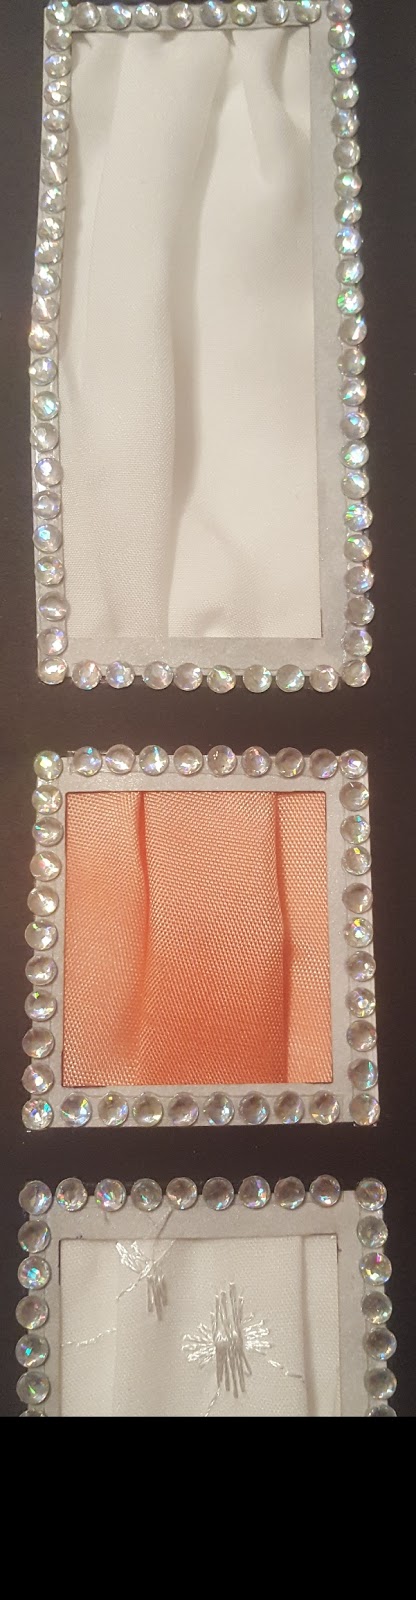
 Below the first row of photos (of my 'adult children) I have added a strip of torn patterned paper and embellished it using Swirls Finesse - White Pearls - 2 Pack - Self Adhesive

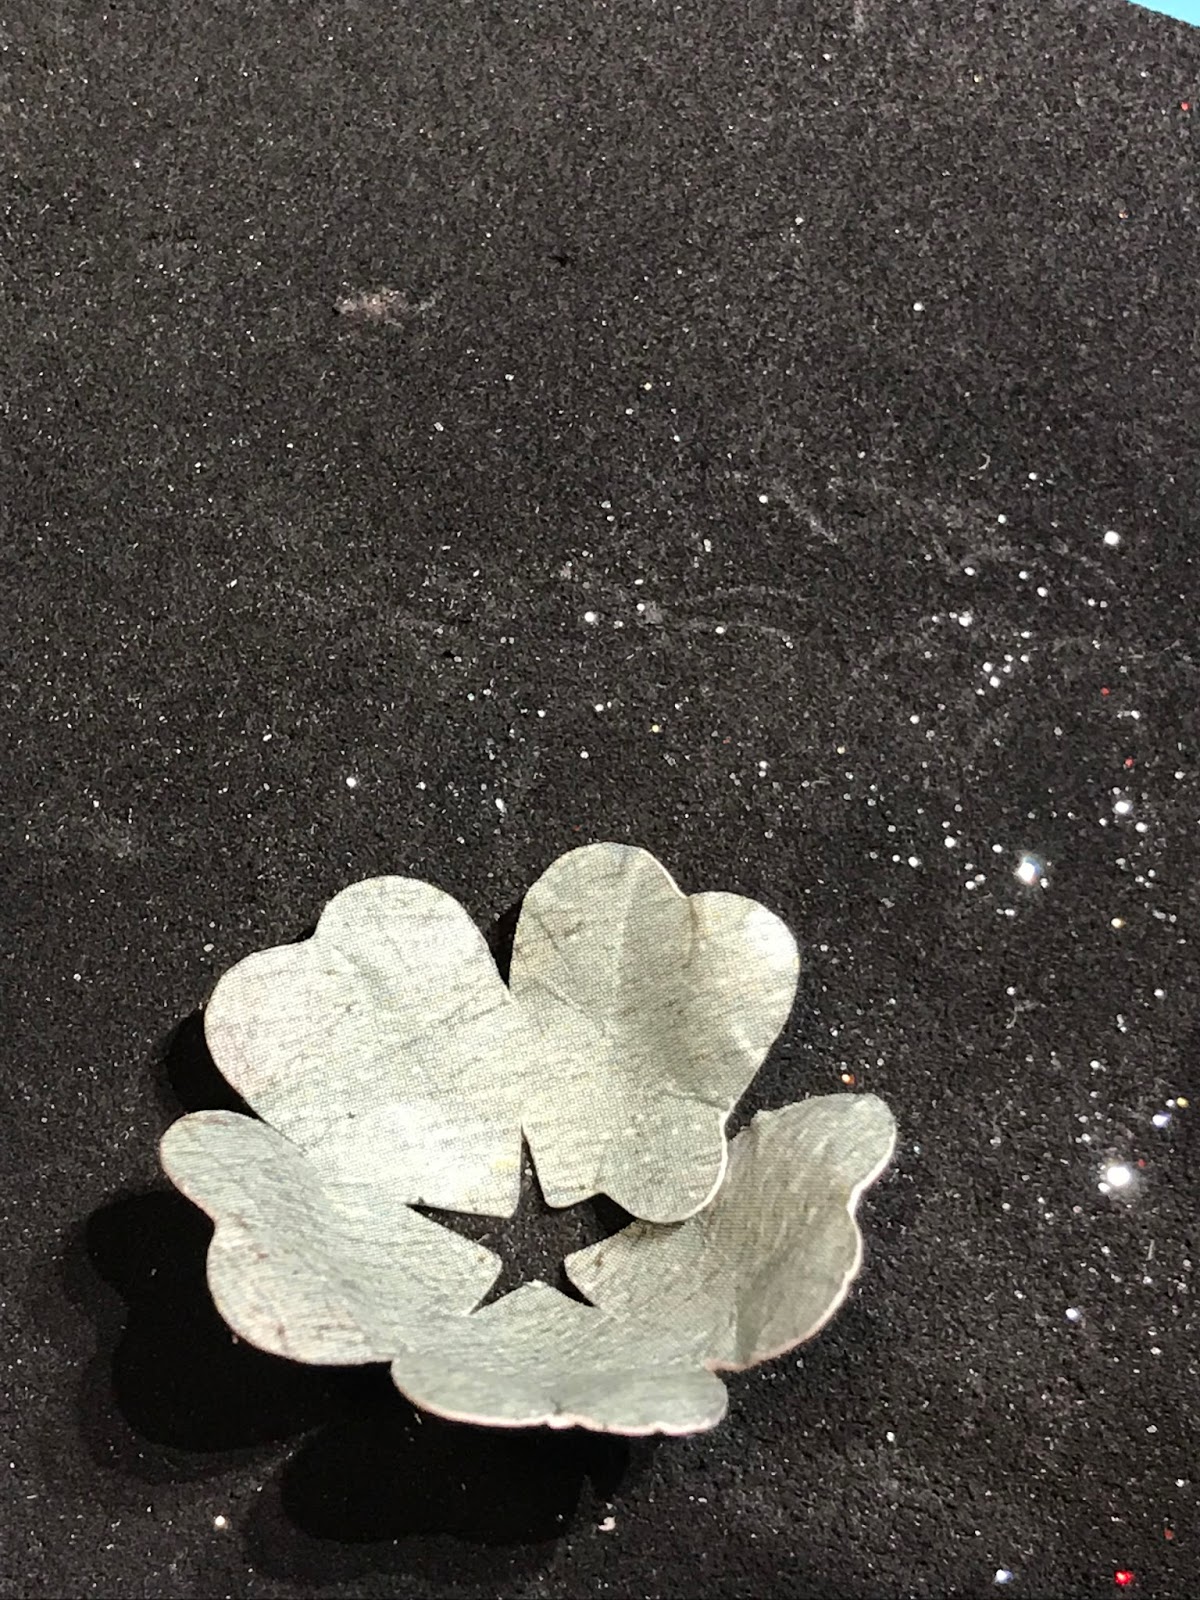
The beautiful butterflies are from Kaisercraft and has been fussy cut/hand cut using scissors, the colours highlighted using Chameleon Art Pens and liquid glitter lightly added.  the wings have been popped up using 3D Foam Squares.


Gimp Loop Braid 1" Ivory lace has been adhered along the base of the photos using strong tape and  250 Count white Pearls have been adhered along the lace.  White paint has also been randomly added to the lace.

Other: 
 Scrapbook Adhesives BY 3L: E-Z Dots Permanent Refillable Dispenser, 3D Foam Squares; Beacon Adhesive: Zip Dry Liquid Glue;  Imagine Memento Ink in Tuxedo Black, White Paint; Kindy Glitz/ Liquid Glitter; Kaisercraft paper (for butterflies) Chameleon Pens; White Gel Pen; Alpha Stickers; Sentiment Sticker

Thanks so much for stopping by and the lovely comments you leave - they are appreciated.  I hope you are inspired to check out the overlays and use them to get your layouts happening!
.
I would love you to visit me on my Blog: Lovely Linda's Craft Central

{{{Hugs}}} and Happy Creating


Tuesday, November 28, 2017

Memories

Good morning friends!!
I've been laid up this last week.  The doctor said to rest, no household chores, and the only exercise I can do is walk.  So this is my translation, sleep in, rest in my creative studio, and walk could mean walking up and down the isles of my favorite craft store very slowly.  I would say that's a good recipe for creating Christmas gifts!


This project is full of techniques!  

Rather than using the Grand Chipboard Album - Labels Four as an album, I'm creating wall art with each chipboard page.  I covered the chipboard;front and back, with paper from My Mind's Eye, inked  the edges with Chestnut Roan cat eye ink pad.

   
 The first technique is using alcohol ink to color the acrylic word "Memories."  Remove the film from both sides of "Memories".  Place a cotton pad on the applicator and sprinkle the pad with color.  Repeatedly dab the BACK of Memories.  Alcohol ink dries very quickly.  Continue to dab the color until you get the look you want.  Once the color has been added, draw a line on the collet pad with Gold and dab across the word.  The gold gives the appearance of gold veining.  

 The second technique is curling flower petals.  The key to this is...if you are right handed, place your left either between your legs or sit on your hand.  With your right hand, place the stylus in the top of the petal and press hard in a circular motion toward the point.  By pressing in a circular motion, the paper fibers break apart and allow the paper to curl.  IF you were to hold the flower with your LEFT hand, the paper would remain still and the fibers would not curl.  That's why this is so important.


 Once you have curled each petal, flip the flower over and press the bottom half of the petal.  This makes the petal pop up with the perfect curl.

 Place a dot of glue on the tab and hold until the petals until the glue is dry.
 Place the small stylus under the curled petal and create a deeper curl.
 Layer each flower on top of each other and press a brad thru the center.  Now layer everything together.

Want 2 Scrap Supplies:
Grand Chipboard Album - Labels Four
Frilly Flourish Swirl - White Pearl
Zip Dry Glue
               

I wish all of you a very Happy Thanksgiving!!

Michelle                                                

Friday, November 24, 2017

Here's to Being Gorgeous with Want2Scrap

Hello Want2Scrap friends, it is Linda here sharing a fun card created using Want2Scrap products. I thought we deserved some humor - I love these Emerson Quillin ladies - I have a few of these stamps and every so often have to have my 'fix!'  Seems the older I get - the more I can relate and of course these gals go hand in hand with all things bling!! 


The image has been stamped using Imagine Memento Ink in Tuxedo Black and coloured using Chameleon Pens.  It has then been cut/embossed using Spellbinders Standard Circle LG and popped up onto the flocked card front using Scrapbook Adhesives By 3L 3D Foam Squares. 


Paper Lace has been added along the lower portion of the circle and coloured using Chameleon Pens and a row of scalloped lace adhered  to the lower portion of the card base, using Double Sided Premium Tape by Want2Scrap - 1/4" x 150 yards with 72 Count - Black Rhinestones - Self Adhesive added along the lace.

Nestabling Heart Circles Black Rhinestones has been adhered around the Die Cut circle.  A double black seam binding bow is glued onto the left side of the lace, a pink, flower button, and black rhinestone glued to the centre of the bow.


Other: 
SpellbindersStandard Circle LG  Scrapbook Adhesives BY 3L: E-Z Dots Permanent Refillable Dispenser, 3D Foam Squares; Beacon Adhesive: Zip Dry Liquid Glue;   Imagine Memento Ink in Tuxedo Black; Chameleon Pens; lace; flocked patterned paper; pink flower button; black seam binding

Thanks so much for stopping by and the lovely comments you leave - they are appreciated.  I hope you are inspired to get your Want2Scrap on!!  I will be sharing more pages as I go along and hope you will be inspired!
.
I would love you to visit me on my Blog: Lovely Linda's Craft Central

{{{Hugs}}} and Happy Creating


Wednesday, November 22, 2017

Hello friends, Lovita Redd here! 
Today I am sharing with you how I captured a fond memory of my daughter's participation in the 2014 Southern Crescent Pearls Debutante Cotillion. 
I used the Want2Scrap 12x12 Dress Up page layout as my theme.
My daughter is dressed in a white ball gown and I am dressed in peach color gown. The left side of the picture of my daughter and I is accented with Want2Scrap's Sleek Strips 12" Pearls in White. I also used Want2Scrap's Swirls Finesse - Silver Rhinestones. 

I used a small swatch of satin fabric in white and another in Peach. Not from our dresses, I may add, my daughter would have a fit...LOL. I lined the openings with Want2Scrap's Sleek Strips 12" Rhinestones - Iridescent.

The shoe was made from the Want2Scrap Victorian Boot Small - Chipboard Embellishment. It's painted white, lined with 1/4" white gimp braid, accented with white pearls and rhinestones with a peach color rose beneath.

I created a 3D dress from embroidered fabric and secured it using hot glue. The dress is accented using 1/4" white gimp braid, Peach color flowers and Want2Scrap Swirls - Silver Rhinestones.

Items used for this project are:
Want2Scrap 12 x 12 Dress Up page layout
Want2Scrap's Sleek Strips 12" Pearls in White
Want2Scrap's Swirls Finesse - Silver Rhinestones
Want2Scrap Victorian Boot Small - Chipboard Embellishment
Want2Scrap Swirls - Silver Rhinestones


Monday, November 20, 2017

Good evening Blogging Friends!

I don't know about you but Christmas is my favorite time of year!  I love designing everything Christmas in my studio, decorating my home, the smell of pumpkin bread floating in the air, and listening to Christmas carols.  I must admit, I'm like a child this time of year, all giddy with excitement!  (And yes I snoop just like a child...but don't tell my husband)

Here's a set of cards using paper from Authentique and all my favorite bling from Want 2 Scrap!  Enjoy!!


Want 2 Scrap Bling-
Couture Swirls (2 pack) by Nina Brackett SW-1005
Pearls 72-Red 2164
Baby Bling-Silver Rhinestones 100 Count Silver

Friday, November 17, 2017

Candy here and today I am sharing how to create a Christmas tree Peace Christmas Ornament featuring Want2Scrap's 4" Large Round Ornament Chipboard Shape.  The design paper is from Heartfelt Creations Sparkling Poinsettia Paper Collection and the poinsettia, leaves and holly leaves were also created using Heartfelt Creations' stamps with coordinating dies.


I painted the 4" Large Round Ornament Chipboard Shape with Gesso. Next I inked the top of the ornament with Gold Brilliance Ink,  added Gold Embossing Powder, tapped off the excess and heat set it.  I traced the ornament shape on my design paper and cut it out.  I adhered it to the chipboard shape with Dries Clear Adhesive and then inked the edges with Tim Holtz Antique Linen Distress Ink.  I adhere the Beautiful Bling Borders by Nina Brackett - Chevron to the center of the ornament, cutting to fit as needed.  Next I adhered the poinsettia, leaves and holly berry leaves as shown.


Wednesday, November 15, 2017

Want2Scrap Mixed Media Journey Card

Hello Want2Scrap friends, it is Linda here, thank you for stopping by. Today I have a Mixed Media card to share with you, created using an eclectic mix of products including Chipboard, Washi Tape and Border Bling.  You can see how it all comes together below.


I have started with a pre-cut card base and some negative Die cuts from the Seth Apter Trifecta Etched Dies as my card front.  A Small Strip of both the Toffee and the Blue Washi Tapes have been added to the top corners and the card front is layered onto white card stock but slightly larger and adhered to the card front using double sided tape.


The Owl is one of my handmade embellishments using Paper Clay and coloured using Chameleon PensIt has been adhered to the centre of the negative dies using Beacon Adhesives Zip Dry.


BEAUTIFUL BLING BORDERS BY NINA BRACKETT - CHEVRON  have been added  below the owl and one strip along the lower edge of  the card front.  The Border comes in individual strips and are easy to use separately or create rows of them.  Three co-ordinating feathers from the Die D-Lites Two Feathers Etched Dies have been cut/embossed and lightly sanded.  These have then been tied with fine twine at the top and adhered using Scrapbook Adhesives BY 3L 3D Foam Squares.  Small beads from my stash have been added to the ends of the twine.


The Journey - Fancy Chipboard has been coloured using  Chameleon Pens, I have coloured it three time to give the depth of colour and then added a coat of Imagine irRESISTibles Pico Embellisher in Electric Yellow.  Once this has dried it has been adhered to the top of the card using Beacon Adhesives Zip Dry.

Random splatters of the Pico Embellisher in Electric Yellow have been added to the card front, along with light splashes of white paint.

Other: 
Spellbinders:S2-270 Die D-Lites Two Feathers Etched Dies' S4-740 Shapeabilities Seth Apter Trifecta Etched Dies;  Scrapbook Adhesives BY 3L: E-Z Dots Permanent Refillable Dispenser, 3D Foam Squares; Beacon Adhesive: Zip Dry Liquid Glue; Chameleon Pens; Imagine irRESISTibles Pico Embellisher in Electric Yellow.

Thanks so much for stopping by and the lovely comments you leave - they are appreciated.  I hope you are inspired to 
.
I would love you to visit me on my Blog: Lovely Linda's Craft Central

{{{Hugs}}} and Happy Creating


Tuesday, November 7, 2017

Good afternoon!  I hope you are all enjoying the beautiful fall colors!  It's such an inspiration to watch the leaves fall and listen to the wind whisper new promises.  I finally ordered pictures from our adventures in Germany and I'm so excited to share our journey with you.  Here's some pics of the start of our journey and the beginning of our next adventure album.  This was a major accomplishment for me since I've never traveled outside of the United States and as a chaperone for some high school German students.  It was an amazing experience and I can't wait to go again.


Want 2 Scrap
Arrows with Words Set chipboard (CE-ARROWSET)
Clock with clock hands chipboard (CE-CWCH)
Paper line is from Graphic 45-City Scapes
Art Glitter adhesive


Want 2 Scrap 
Chubby  Bubba Chipboard Alphabet (4057-2)
Beautiful Bling Border  by Nina Brackett (4502)
Memories-Beautiful Script
Airplane charm
Paper line-Graphic 45 


Wednesday, November 1, 2017

Want2Scrap Journal Page

Hello Want2Scrap friends, it is Linda here from 'The Land Down Under' -  thank you for stopping by. Today I am sharing a page from my ART Journal, using Want2Scrap products.  Journaling is a fairly new art form for me but I am loving the journey and am continually learning - and having a lot of fun doing it.


It all started with the Mad Hatter stamp - love at first sight, especially growing up with 'Alice in Wonderland' I coloured him using Chameleon Pens, fussy cut/hand cut using scissors and popped him up onto  patterned paper using Scrapbook Adhesives BY 3L 3D Foam Squares for that little bit of dimension. The strip he is adhered above is from some handmade patterned paper I created and have used a couple of times on this page.


The sentiment is an eclectic mixture of Spellbinders Simply Said Etched Alphabet Dies, stickers and computer generated.  they have been adhered using Beacon Adhesive liquid glue and of course the stamped sentiment from Tim Holtz.

Using the Brick Stencils and Imagine Radiant Neon Inks, brickwork has  been randomly  added around the photos - in both big and small sections - the stencils wash clean with warm soapy water.  Stenciling is such a a great effect and very quick and easy - so many mediums can be used - ink, paint, gesso just to name a few.


The Gear Corners 2 Pack Chipboard Embellishment  has been sponged using Imagine Delicata Inks to add a wonderful shimmer.  The edges have been defined using a White Gel Pen.  It has been adhered to the top left portion of layout using  Beacon Adhesive liquid glue.

Other: 
SpellbindersShapeabilities Simply Said Etched Alphabet Etched Dies;  Scrapbook Adhesives BY 3L: E-Z Dots Permanent Refillable Dispenser, 3D Foam Squares; Beacon Adhesive: Zip Dry Liquid Glue;   Imagine Memento Ink in Tuxedo Black, Delicata inks, Radiant Neon ink in Electric Orange, Chameleon Pens

Thanks so much for stopping by and the lovely comments you leave - they are appreciated.  I hope you are inspired to get your Want2Scrap on!!  I will be sharing more pages as I go along and hope you will be inspired!
.
I would love you to visit me on my Blog: Lovely Linda's Craft Central

{{{Hugs}}} and Happy Creating

LinkWithin

Related Posts with Thumbnails
Pin It button on image hover