Tuesday, July 27, 2010

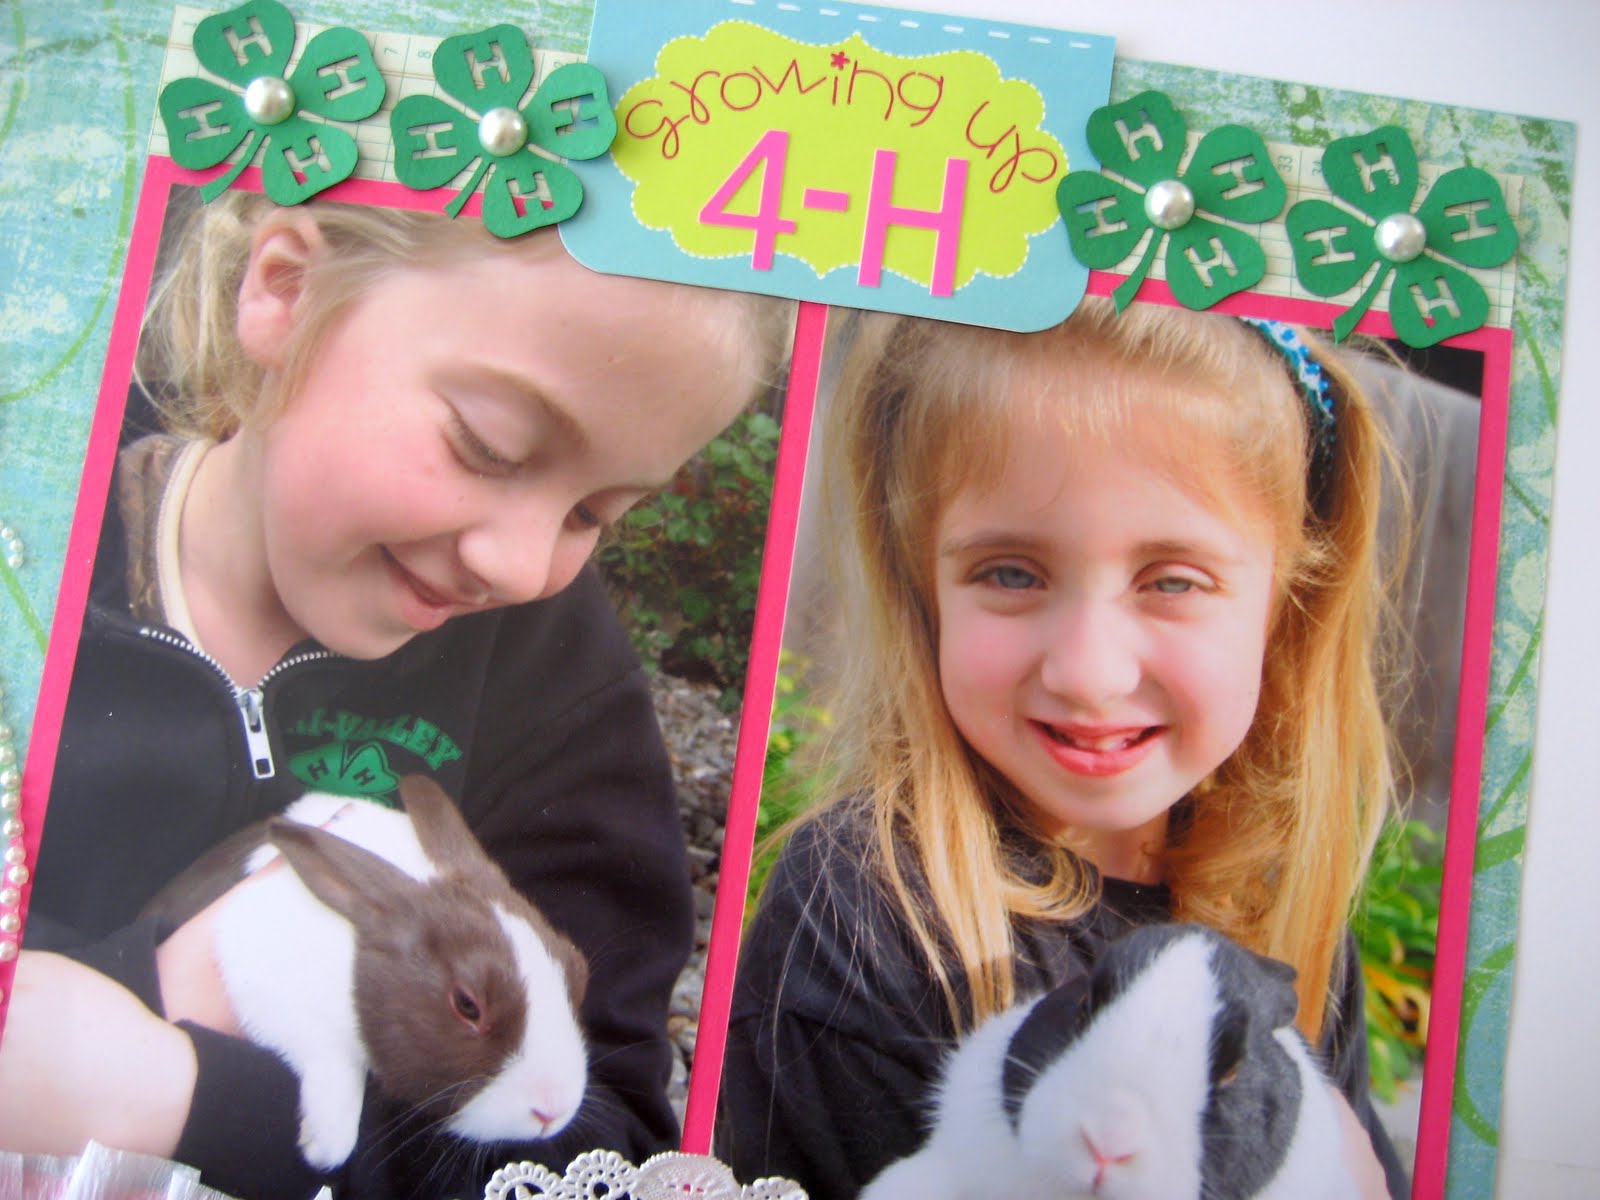
Growing Up 4-H

Hi there!  Dana here with a layout using Want 2 Scrap bling, ribbon and laser die cuts!  I was overjoyed to find that Want 2 Scrap carries 4-H die cuts.  4-H is a youth organization that my girls are currently involved in and one I enjoyed for 10 years as a youngster and am now back in the parent volunteer roll as their Arts and Crafts leader.  They also happen to be involved in the Rabbit project as well as the Cooking project this year.  Check out these darling bunnies with my darling girls!
 
I wanted to showcase these treasured pictures using Want 2 Scraps laser cuts that closely represent the official 4-H logo.  It is many times difficult to find such a thing for organizations like 4-H, Girls Scouts, etc.  I balanced the official looking logo and the ledger paper elements with lots of girlie touches like ruffled ribbon, pearl bling, scallops, doily, and new papers from the Cosmo Delovely collection.  The backdrop 12x12 DP is from K&Co and is part of their Girl Scouts collection.
 
The ribbon ruffle can be easily accomplished using a strip of high tack adhesive and then finger folding and tacking the ribbon at various spots along the strip of tape.  For a "flatter" ruffle fold ribbon, add bits of liquid fabric glue (I'm a fan of Fabri-tac) under the folds or perhaps a glue dot.  And check out the green pearl bling!  Isn't it wonderful??

 
Here's close-up of the large die cut 4-H clover.  The smaller 4-H clovers actually come in a strip but I could easily seperate them into individuals with a snip of my scissor.  For tons of unique laser cut shapes, be sure to visit the Laser Designs area of Want2Scrap.

Thanks so much for coming by today! 


Thursday, July 22, 2010

A Wall Hanging for Me!

Hey all! It's Melissa again to show you another project using an acrylic heart from the heart album to make a pretty wall hanging. :) I also have some tips to offer on how to offset the size of a shape very simply with a ruler and pencil!

First off...I've been wanting to make a little something special for me to hang in my craft room. My room is a complete organized MESS, lol! So I've been wanting to use the phrase, "creative people are seldom tidy".....so true in my case!


I used one of the chipboard hearts in the center of my project and decorated it up with some patterned paper, glitter, and some trendy rolled flowers. :)


So here are some tips on how to create your offset heart shape by using your acrylic heart as a template....
First, you'll start by drawing the outline of your shape on the BACK of the patterned paper you want your offset shape to be from.


Then, you take your ruler and decide how far you want your shape to be offset by...I chose about 3/8 of an inch.

Now, take your ruler and measure 3/8" to the inside of your shape line and make little tick marks. Just keep doing this all throughout the interior of your shape until you've gotten your desired shape completed.

Then cut along your tick marks, and voila! You have completed your offset shape to show off that acrylic base!

Don't forget to peel off the protective backing so your acrylic shows nice and shiny clear! I hope you enjoyed my tips and project! Until next time....

Tuesday, July 20, 2010

The Key to My Heart

Hello friends! Melissa here again to share with you the ones that hold the key to my heart....my family of course! I knew exactly how I wanted to lay out this little album, building on its pages from smallest to largest. Hold on to your hats...it's about to get picture intensive in here!


Starting from the inside cover...


My little rugrats....the ones that keep me crazy (in love) every day!


The first couple pages were covered with patterned paper and I saved the last two to really showcase the acrylic....something about having a see-through page just really makes a statement to me!

Now this is where I start having a bit of a challenge with the photography.....I need to learn to somehow get rid of the pesky bulbs and glare!


Did you happen to notice a couple pictures back, the page with the scalloped edge? I thought it would be neato to draw some interest to that by stamping within the scallops. Here's how I did it!

First, you'll want to use a nice ink, like Staz On, that dries relatively quickly and won't smear (EVER!) off your acrylic.


With this particular color, you'll need to re-ink the pad for every application. I went nuts and just spread a bunch on!

Then, you can carefully ink up your stamp and stamp to your heart's content!

You can see that I over-inked a bit, but that's ok! I like the look that turned out. If you're unhappy with your stamped results, rubbing alcohol can easily erase the staz-on right off for a do-over!


I also managed to sneak in some more fabby products from Want2Scrap...like the pearl and rhinestone bling!

Those pearls were actually white, but with an alcohol based marker, you can make them any color you want!

Oh! And the heart on the cover...that's from the heart chipboard pack!


Ahhh, I will definitely treasure this little album. My family...they hold it. :)


Thanks so much for hanging in there with me....until next time!

Wednesday, June 16, 2010

Vintage charmer

HI everyone!  Dana here with a fun vintage image that has been dressed up with Want 2 Scrap pink pearl bling and twill ribbon.  The twill was hand tinted using glimmer mists in rose and suede colors.
This lovely lady is an image I found on the Clearly Vintage blog.  I printed her with Word and then got busy with Want 2 Scrap products and ink.  SUPER simple card design with layers of cardstock, sewing details and unique textures and edgers.  The twill tape ribbon was first temporarily adhered with ATG adhesive and then I ran a straight stitch with my sewing machine. 

Are you ready for summer now?  I am!  Thanks so much for stopping by!

Wednesday, June 2, 2010

It's the Little Things...

HI everyone!  Isn't it so?  Isn't it many times all about the little things?  Especially when they are soooo cute like Want 2 Scrap bling and ribbon!  Check out how the green pearl bling adds a little something special to the already gorgeous butterfly design of Jen Allyson.

You can also find Want 2 Scrap in the silver bling up in the top left corner and check out the delicate white crochet ribbon included in a mixed bag of ribbon I received.  Just a bit of this ribbon adds such a wonderful texture to this card.
I wanted to make sure this card had a real "fly away" quality to it.  This was easy to accomplish by only adhering the body of the butterfly to the card base and gently curling the tips of the wings with my fingers. 

Thanks so much for coming by today.  I can't wait to find more ways to incorporate the fabulous "little things" from Want 2 Scrap!

Thursday, May 6, 2010

Happy Mother's Day and one of my favorite layouts ever...

I don't know why some layouts become favorites but I love this one. There is no picture of my boys, or my sweet hubby, or my Bassett Hound Lucy. No adorable nieces or cutie nephews. For some reason I love this one.


I took these photos for my photography class. I was sitting at another soccer practice for my son. It was the day before my class and I had "homework". I needed to take pictures of a non-living stationary object. After looking around this bag was what I had and I shot away. After printing the photos I knew I had to do a layout using them.


My son Nick has loved soccer from the first time he played and it has become such a huge part of our lives. I think I showed that even without a picture of Nick.

I made this layout to highlight some of Want2Scrap's fun goodies. This is the third project I have used these acrylic stars on. This time I layered several different rub-ons on them to "dress them up". I also used Want2Scrap's ribbon and I so love their black pearls! Check out the store here.

Thanks so much for stopping by! Hope you all enjoy the upcoming Mother's Day weekend. We will spend it at a soccer tournament and I will be loving it! Hugs

Friday, April 30, 2010

Wedding Wishes with Bling!

Hi everyone! It's getting to be that time again....the weather is warming up, the birds have returned to sing, and the flowers are beginning to bloom. Spring is upon us and in come the weddings!! I was lucky enough to attend one recently and when I saw these little brides and grooms on the seat assignments, I immediately KNEW I had to make something from these! I thought that this gorgeous large heart bling from Want2Scrap was absolutely perfect for my little bride and groom. :)


Isn't that heart just gorgeous?!! And won't they just be tickled that something from their wedding was used to make a card for them?? Ok, the groom may not think it's the coolest thing since sliced bread, but I bet the bride will! Ahhh...love is definitely in the air....and the pollen is too, but that's an entirely different story!

Thanks for visiting!

Melissa

LinkWithin

Related Posts with Thumbnails
Pin It button on image hover