


Hello friends! Dana here with some updates and a tutorial for you using the JUST released Nestabling! There are so many reasons today for me to say "pinch me, please!" because the excitement here at Want2Scrap is high friends, cloud 9 high! The team down at CHA is just bursting with good news today and I am happy to share some of it with you. But first, just a huge THANK YOU for all of the great feedback over the new product line. We hear you and we are so grateful to have you cheering us on! Something else you will love is that we had 10 peeks here on the blog leading up to CHA, but guess what? There are a bunch more coming! Oh yes, that's right, we have Nestabling for the brand new Nestabilities releases too! As soon as possible, we will be showing you the FULL Nestabling release here on the blog and friends, you are gonna fall in love all over again! I have been given the shipping date of these brand new items and it will be April 1st, no foolin! Also, we will be taking pre-orders starting in a week or two as soon as the dynamic duo of Michele and Michele return from CHA. Stay tuned to the blog or our Facebook page for when we open up the ordering.

The Nestabling set I am using today matches up with the Nestabilities Peony. Again I say "pinch me, please!". Does it get any friendlier than the way the Nestabling and this Nestabilities play together?!? I think not! I received a set of black bling Peony and it is so striking. I love how the bling gently scales down in diameter as you move down in Nestability die cut size. I used my one set of Peony Nestabling on the card you see above and it is currently on display at CHA so I won't be able to show you application of the bling throughout this tutorial (doh!) BUT I will walk you through all the steps to get this gorgeous Peony to come to life. Ready to see how I did it? OK, let's go....

This flower uses 4 pieces of the Peony set. Prior to adhering your Nestabling to the edges, perform any inking (as I did above), stamping, texture plating, etc. Once complete, adhere your Nestabling to the edges of your flattened out peony cuts. OK, ok I can hear you say it..."but Dana, how can I adhere the Nestabling NOW when there is so much manipulating to be done to the flower pieces?" And to that I say, adhere with confidence, the adhesive on the Want2Scrap bling is that good. Truly, adhere it now.


PINCH and gather will result on four layers that look like this! They remind me of swirly dancing skirts!


A couple more notes on these peonies as I have constructed them....

The finished piece looks like the above. Thanks to all that PINCHING, we end up with a fairly pronounced bottom. This is not a bad thing, in fact it would make a perfect paper flower to thread a floral wire through and then stem wrap the bottom and the wire with ribbon or floral tape. But, if you are using it for a card.....
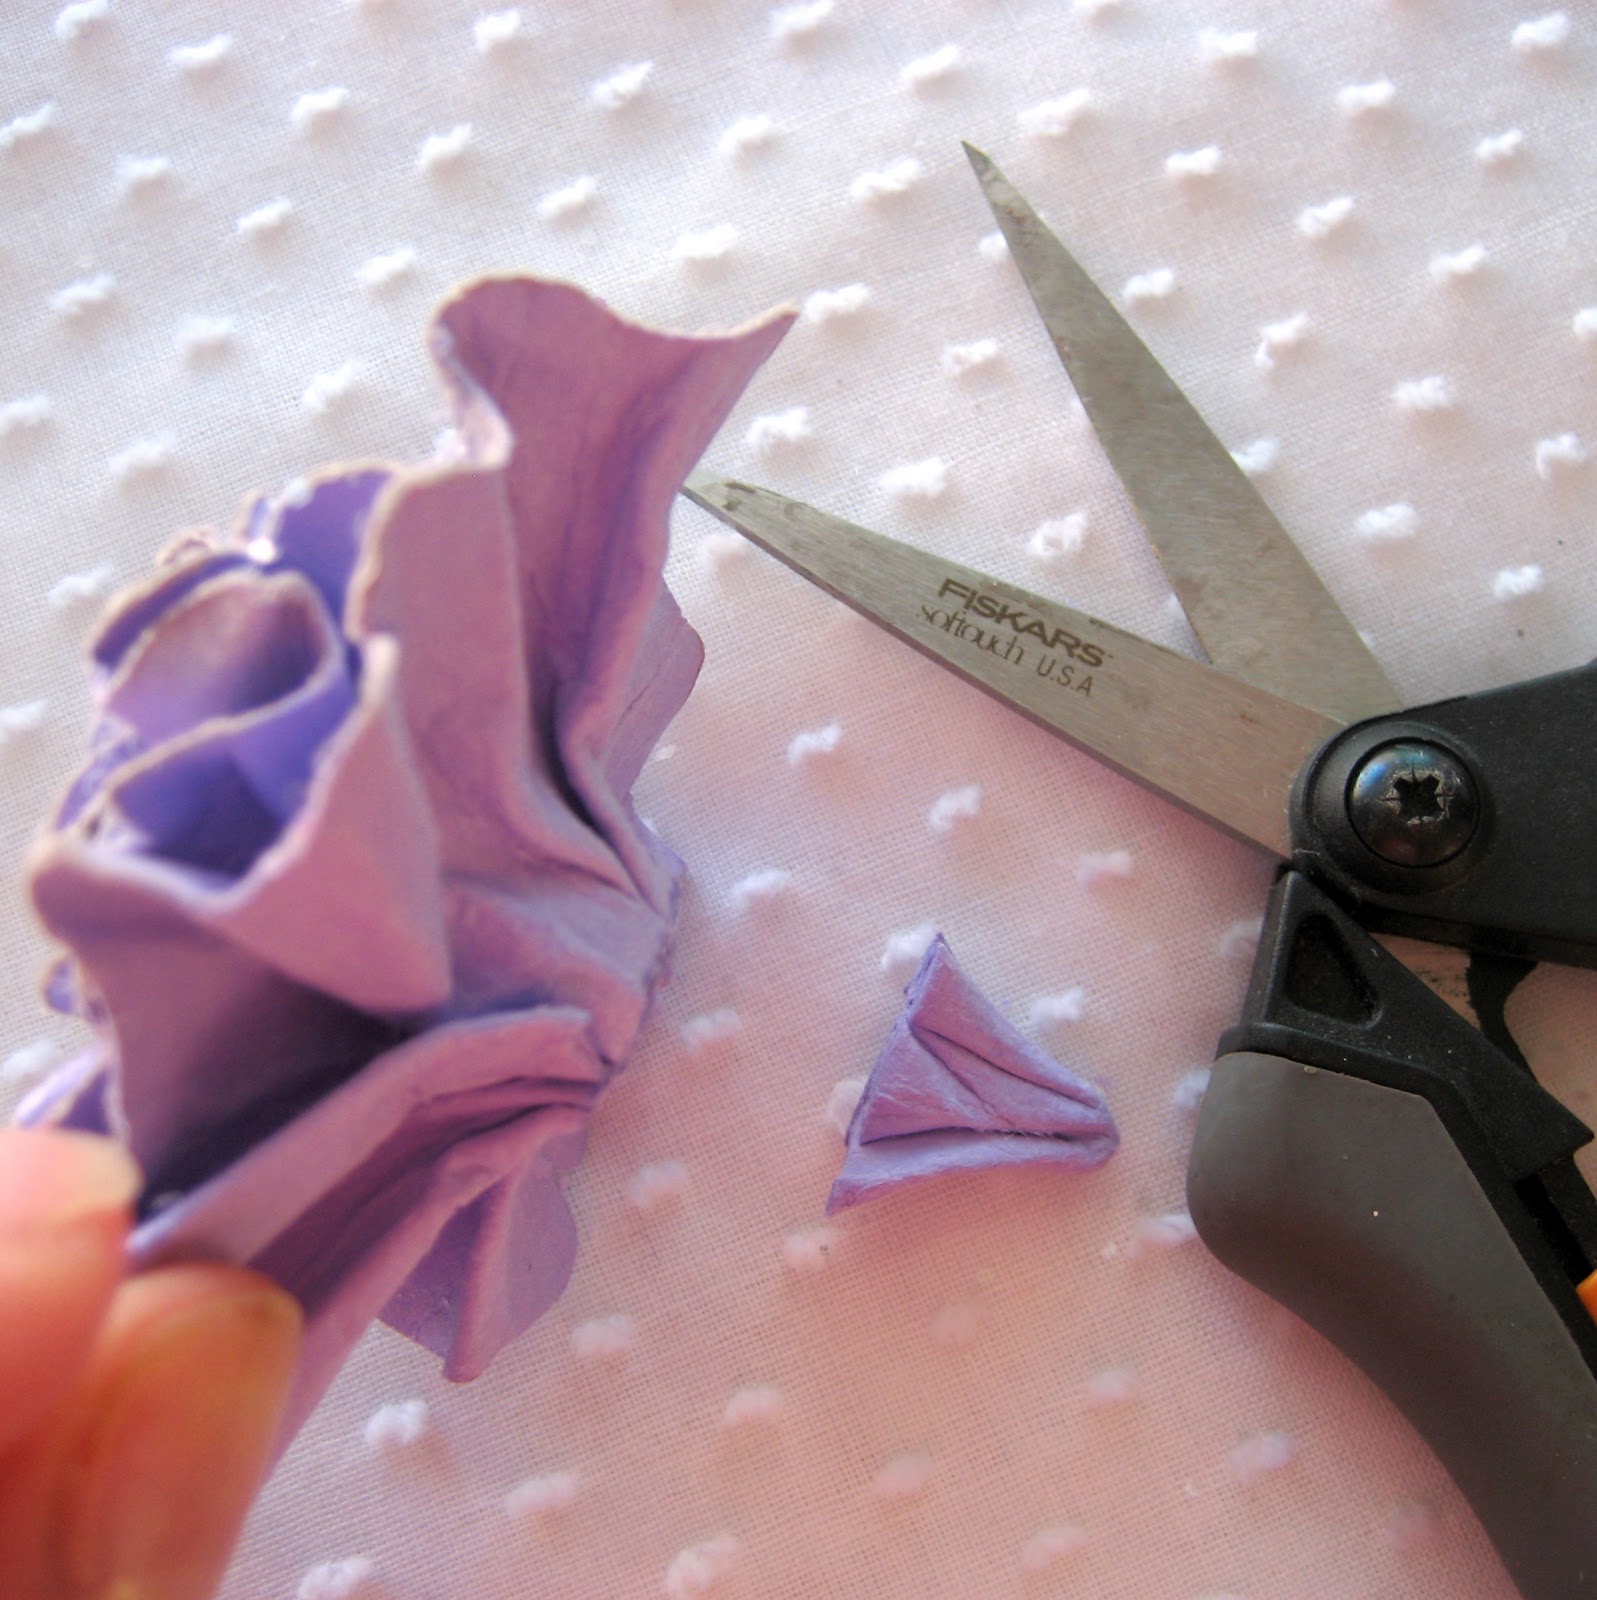
you are gonna have to give it a little snip. Easy peasy and ready to adhere to your card.
I hope you've enjoyed this tutorial and will make some peonies for your own projects. Keep checking our blog for product updates, challenges and the announcement of our five winners of the full release Nestabling line!! Good luck to all of the entrants so far and thanks again for all of your enthusiasm!

So excited for the Nestabling to come out! It was great meeting you gals at the show. Thanks! I know our customers are going to love it!
ReplyDeleteTFS
ReplyDeleteflowers are lovely and lookin forward to y our new release
Ohhh, wish I could be at CHA; maybe one day!!! I LOVE this peony without the Nestabling, so I KNOW with it, it's absolute perfection!!! ;-)
ReplyDeleteThat is one GORGEOUS flower! (now if only I had some of that pretty Nestabling to put on my peonies) ; )
ReplyDeleteDana this is just beautiful. Thanks so much for the detailed tutorial. I am anxious to give it a try. Thank you again for taking the time to share with us. :)
ReplyDeleteThat peony is so beautiful and I love your card!
ReplyDeleteVery pretty! I am going to try this.
ReplyDeleteMichelle A.
Pure BRILLIANCE! What a HUGE innovation for all of us bling-lover's out there! I cannot wait to try this technique and get my hands on some of THAT bling! THAT'S what I'm talkin' about! Yipeeeeee!
ReplyDeleteHow do you find out who the contest winners are? I have been checking the blog, but have not seen any announcement?
ReplyDeleteHi Cyndee! Thanks so much for your interest in the Nestability giveaway. Once the gals at Want2Scrap get back home from CHA and settled, the giveaways are the first item of business on the list. Hang in there!
ReplyDeleteGreat tutorial. Thanks for sharing! I love how these turned out!
ReplyDelete