Showing posts with label Nestaboard Labels Eighteen. Show all posts

Tuesday, January 15, 2013

Beautifully Frame Your Cherished Photos With Nestaboard and Bling!


Hi everyone!
True :D here to share a couple of projects with you.

Now, I could have taken this darling photo of my grandson Joseph, and taped to to the refrigerator to display, but why just tape, when it's so easy to turn it into a beautifully framed piece of art?


I simply took a Want2Scrap - Nestaboard Labels Eighteen piece, covered it with a scrap piece of designer paper from my stash, and inked the edges.
After it dried, I adhered a photo and the "baby Joseph" pieces that I made from kraft cardstock. The beautiful finishing touches of 72 Count LeCreme Pearls and 72 Count Turquoise Rhinestones, add so much sparkle and shine! I added a couple of magnets to the back and placed it on my refrigerator so I can see my darling grand-baby every time I walk past it. ;)

I thought I would share a bonus project today as well.
I created this card for Inky Antics CHA board display.
It was created with one of my brand new stamp sets and designer papers!
The stamp is #11156MC "Swirly Butterflies" clear set, and the paper is my #IA-PAC002 Butterflies on Roses designer paper. 


I loved how this card turned out, but it wouldn't be nearly as pretty without adding the sweet 72 count Pink Pearls.

Want2Scrap Product Used:

Preferred Partner Products Used:
Spellbinders - Circle and Scalloped Circle Nestabilities
Art Glitter - Ultra-fine Transparent Glitter

Other Products Used: 
Inky Antics -  #11156MC "Swirly Butterflies" clear set, and  #IA-PAC002 Butterflies on Roses designer paper
Cardstock from Discount Card Stock
Ribbon from Really Reasonable Ribbon
Paper rose
Adhesives
Die Ink

Thanks so much for dropping by!
If you like either of my projects, please feel free to "Like", "Share", "Pin" or comment. :)

Hugs,

Monday, October 8, 2012

Tree Pose

Every year, I take photos of my kids with the same tree.  It's kind of like a growth chart, tracking how big they are (and how much the tree has grown) every year.  Each year, I scrap them individually and together with the tree.  This is the "together" photo, which they weren't terribly interested in posing for.  

I used some of my new Want2Scrap products on this layout, starting with one of the Fancy Framed Tags 2, which I coated with gesso (the easiest way to get a mice clean white).  Behind it I layered a Nestaboard Labels 18, which was colored with Ranger Distress Stain.   The letters got the same treatment, to help the overall layout feel coordinated.  


Thanks for taking a peek!

Want2Scrap™ Products Used:

Partner Product Used: 
Authentique Alphabet
Beacon Zip Dry

Saturday, May 26, 2012

Little Darlings Album

Album: Want2Scrap “Large Labels Chipboard Album”; Chipboard: Want2Scrap “Nestaboard: Labels Eighteen, Beaded Square”; Embellishments: Want2Scrap “Nestabling: Labels Eighteen White Pearl, Beaded Square White Pearl, Finesse Swirls Cream Pearl, Baby Le Cremme Pearls, Large Kimmie Brackets Cream, Classy Corners by Nina Brackett Silver Rhinestone – Grace, 72 Count White Pearl”; Maya Roads “Pearl Pins”; Adhesive: Beacon Adhesives “Zip Dry”; GlueArts “3D Combo Pack Raisen’s & U Cutit Foam Square Blanks”; Paper: Graphic 45 “Little Darlings Collection: Bundle of Joy, Heaven Sent, Little Darlings, Little Treasures, Lullaby, New Arrival , Peek-A-Boo, Rock-A-Bye”; Die-cuts: Spellbinders “Nestabilities: Beaded Squares (S4-315), Labels Eighteen (S4-310), Grand Calibur (GC-001)”; Ink: ColorBox “fluid Chald Chestnut Roan”; Ribbon: Creative Impressions “Seam Binding Cream, Crochet Ecru Lace, Ivory Satin”; Misc: Vintage paper doily, yellow paper flowers, hot glue, tulle”
I was so excited to finally be able to share this amazing album with you, this particular album was published in the online magazine called Scrap n Art, you can check out other inspiring creations from Want2Scrap featured there too. I hope you enjoy these fun pages.


Tip: Want2Scrap makes adding decorative bling quick and easy with Nestabling as it matches Spellbinders die cut shapes perfectly, no more adding bling one at a time.

Thank you for stopping by my blog post today, crafty smiles,

Thursday, November 24, 2011

Distress, no mess! Happy Thanksgiving!

It looks like another "get your hands messy" kind of day! I decided to create this tag to add to the planter that will sit at my Thanksgiving table using lots of Want2Scrap™ products .

A few details...

This is what you will need:
Distress ink or stains
Spray ink
Paint
Faber-Castrell Gelatos
Tag, water, paintbrush

I started off staining both the cardboard and Nestaboard™


Now add a little paint to the edges and crevices...you can use a brush or just a finger.

Now used distress inks to distress the edges of your materials.

Use the spray inks to distress your tag.

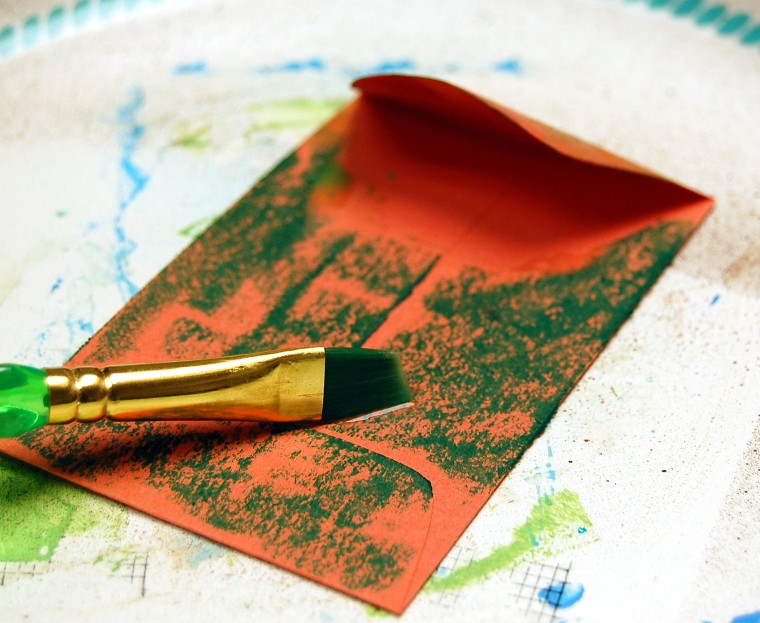
Color the envelope with gelatos and add a little water to them to spread. It brings on a water color type of look.


Hope you are enjoying your holiday and find time to get a little messy yourself!


Want2Scrap™ products:
Nestaboard Labels Eighteen™
Chipboard Embellishments - Style A
Nestabling Petite Scalloped Circles in Silver
72 Count - Silver Rhinestones

Product Partners:
Beacon Adhesives

Other Products"
Ink- Ranger
Paint- Claudine Hellmuth
Spray Ink- Tattered Angels
Walnut Stain- Fiber Scraps
Faber-Castell Gelatos
Pattern Paper- Lily Bee, Websters Pages
Alphabet- K & Company
Other- Cardboard, Tag, Envelope, Placecard

LinkWithin

Related Posts with Thumbnails
Pin It button on image hover