Helloooooooooo there, readers and fans of Want2Scrap!
It is my supreme honor to share with you, my very first post and tutorial as an official member of the fabulous Want2Scrap Design team! I am THRILLED to be joining the ranks of this fantastic group of lovely, KIND and oh, SOOOOO talented gals...
The joy of representing this FINE line of products, well,
I'm hoping that will speak for itself....

It's a FESTIVAL -o- the green, brought on by some GORGEOUS Want2Scrap bling
that just reeked of Leprechauns and rainbows,
shamrocks and pots and pots... of TREASURE!

Yes, indeedy do... I don't need to kiss the Blarney Stone to express HOW much I feel like clicking my heels, just like this lil' guy... I loves me the bling, so I'm BRINGIN' some fun tutorial,
right here, right NOW...
Just a few snapshots of creative fun and exploration
to get your collective creative gears turning...
{Ways to use bling, ways to use bling, ways to use BLING & lots of stuff,
you may have near your craft table - RIGHT THIS MINUTE! Eeeek!}

Strap yourself in and get your scrolling fingers out
{this will be a way over-excited and photo-filled journey... I apologize in advance...
BUT I have a cornucopia of discovery to share!}....
On today's menu:
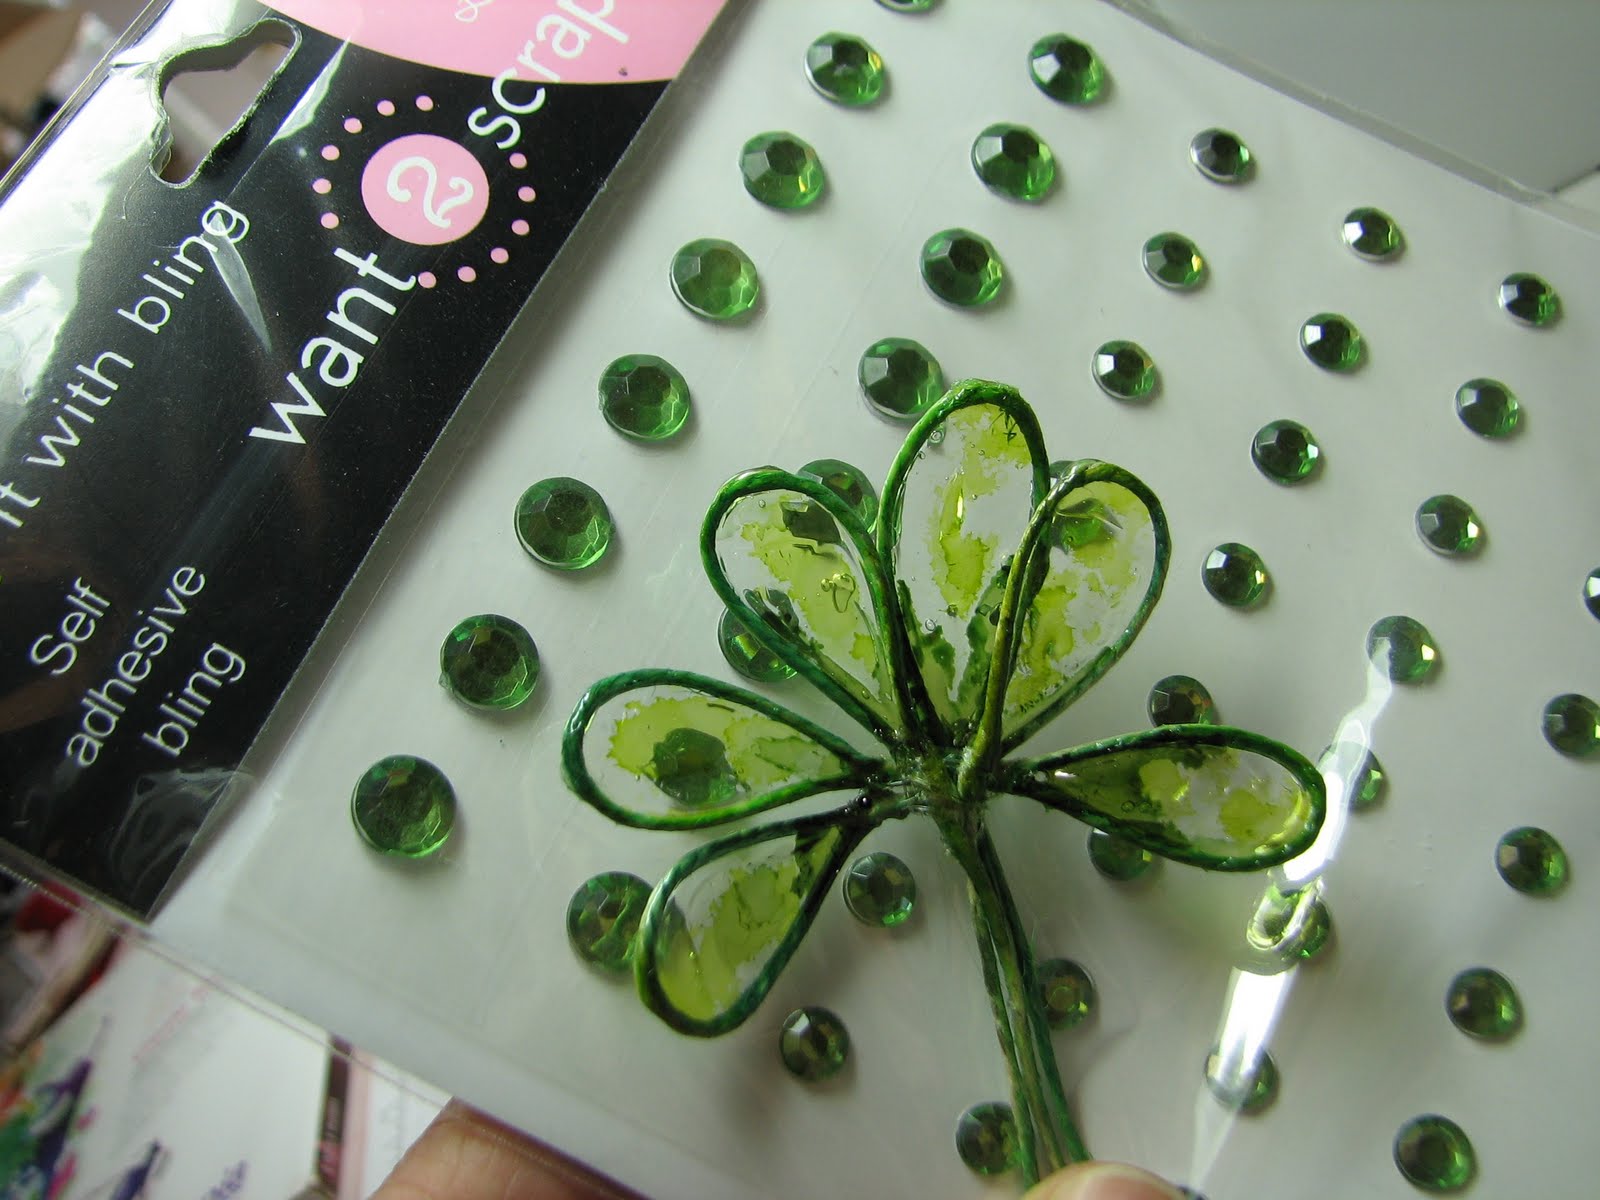
BLING EMBELLISHED HEMP SHAMROCKwith a light alcohol ink reduction glaze....
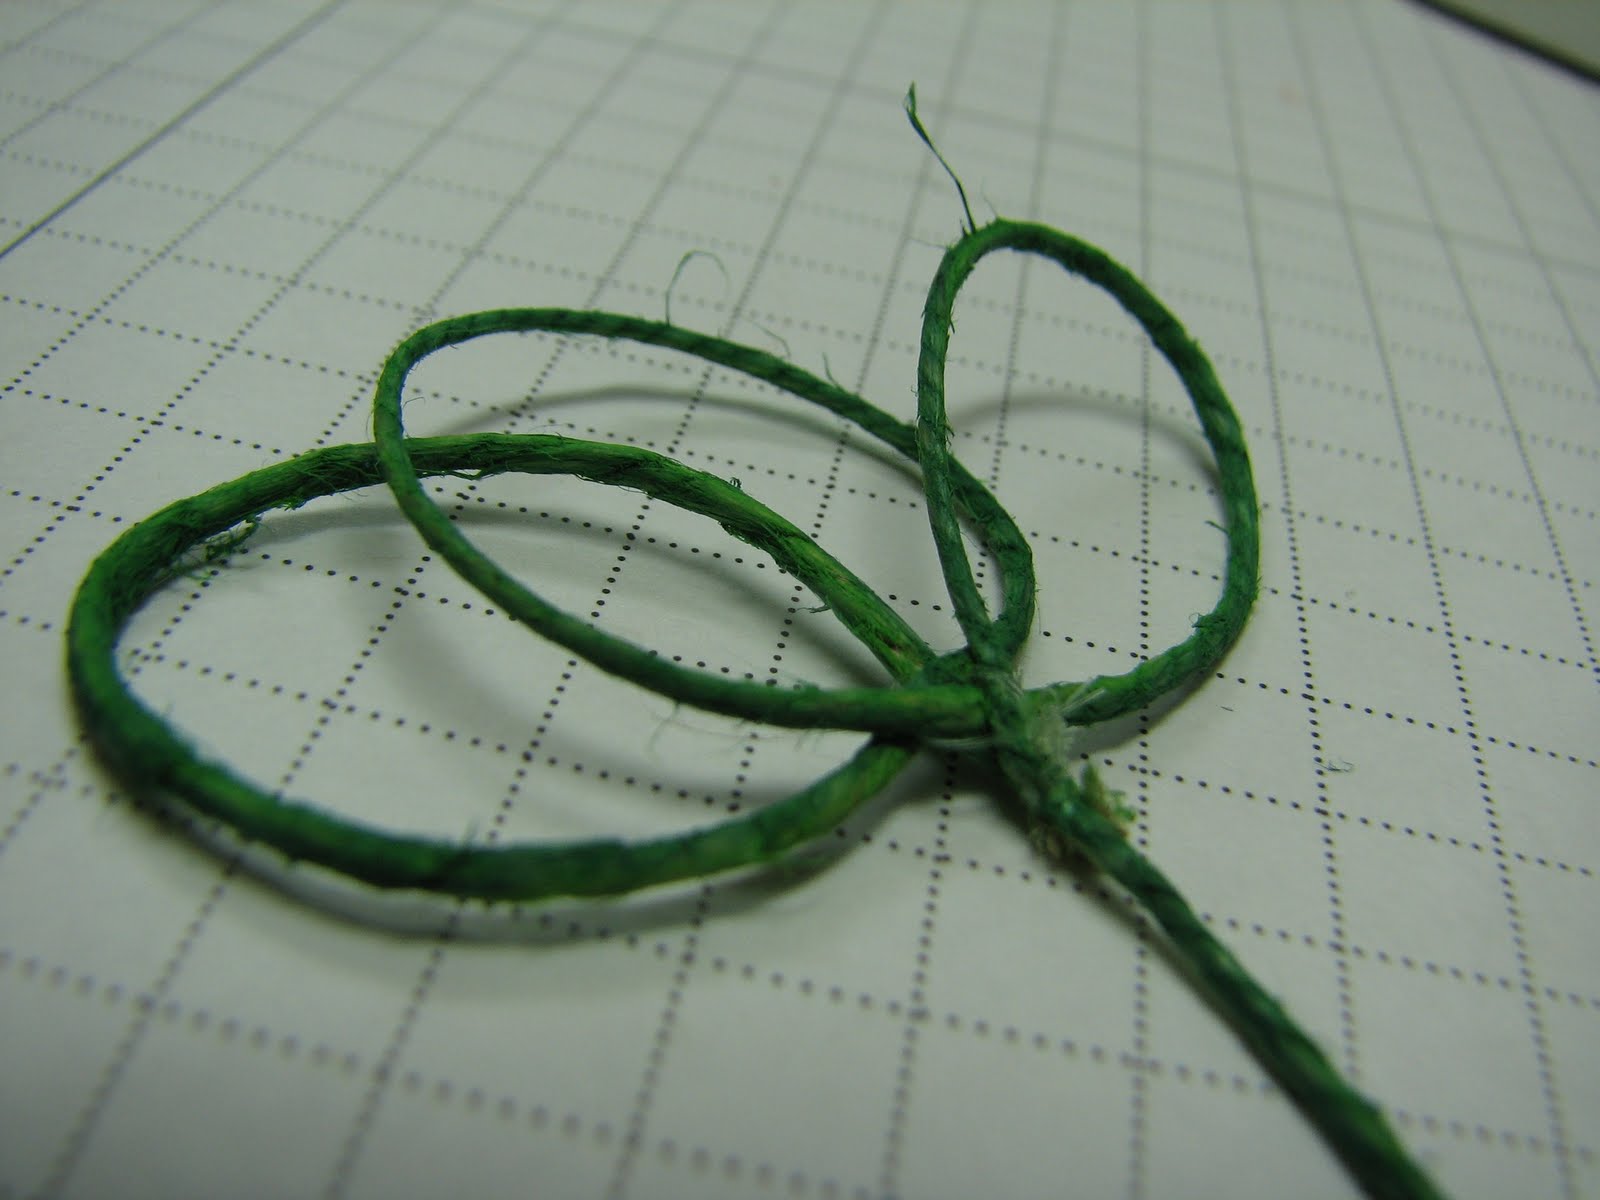
Natural hemp twine is easily colored! For my "study", I chose to ink the twine with craft/pigment in so that it would dry and not dilute with my "experiments!"

I've been kicking around some ideas to make twine flowers for a while. Although the consistency of twine is unpredictable, by nature, I love the strength,
inherent in the twine consistency over all...
{Call me PROFESSOR Want2Scrap! Please.... ahem!}

Something, VERY curious, began cooking in my little noggin, when I stared at these shapes...

Although I HAVE a hot glue gun, I tend to leave it in the drawer, when I could use it THE MOST! {For HOT GLUE GUN support group info, see me AFTER class... } heh heh
SOOOOO! I keep a needle threaded with monofilament in my tool tote at all times! This works so well, IMHO, for "sculpting" with heavy twine.
{P.S. Please keep your concerns about my lack of manicure to yourselves -
I spend MY extra money on BLING & horse feed... !!!
Seriously..., ACK! Don't look at my "ranch-hands"...}

I love that by stitching this flower together, the result is clean and low-profile. That's why I decided to leave the flower exploration aside at this point, and go for SHAMROCK, instead!

THEN, I had this crazy 1970's flashback...
"Dip It" flowers... Remember THEM?
{Say you REMEMBER! Even if you were just a baby.. or gasp, not born yet!}
They were SO popular when I was a kid! There were several mini paint cans of the most toxic, noxic, foul - smelling, brightly colored, but translucent plastic epoxy material... EVER. In the kit, you'd also get wires and some floral design supplies. You'd create petals with the wire, dip it INTO the plastic....
ANYWAY, whether you were there or not,
here's how I adapted THAT idea into our ordinary paper craft supplies....
Create a single petal, small enough to fit into a bottle
of your favorite dimensional adhesive.
{For the CSI's out there, I used Aleene's.
You need to have access to the neck of the bottle...}

I used long tweezers to dip my petals.

THIS was THE ONLY WAY the glue seemed to stay. I can't tell you why...

I tried using a tub to dip petals, flowers and full shamrock shapes,
but this was the only method that worked... {at all!}...
Think: bubble blowing tool...

Each petal was left to dry, at the same angle, pictured above... {I used a pot of pens to anchor my hemostats. I have many pairs of of these, so it was a little like baking cookies.} Unbelievably, they dry pretty fast. You can tell, because the glue will begin to ripple and become clear. Anywhere that still looks cloudy - IS STILL WET! So, no matter how tempting, DON'T TOUCH!
If there is only some cloudiness at the bottom of the hung petal {what will be the OUTSIDE edge of your flower/shamrock} it's okay to dip the petal again. I dipped all of mine, twice, to get a real glassy effect. Once the second dip is dry, you can even add more of your clear, dimensional glue directly to the shamrock and the let dry flat {wet side up} on a non stick surface...
This is how mine looked, once dry....

I left the stems on a few of my petals, but several of them were cut short.
I anchored and attached the entire shamrock with more clear stitching.
As I added each petal, I made a knot, but then continued using the extra
thread to wrap my shape as well. This gave me control & support for
optimum shamrock construction and design{!}..... Lookeeee!

In spite of efforts to color my glue, the ONLY way I was able to apply
color, directly to my shamrock was with small amounts of alcohol ink, dabbed
LIGHTLY to the petals... {All OTHER attempts to tint my glue, made the consistency
unable to hold a shape. Chemically defying the odds, this outcome was proven again,
and again, by my stellar team of scientists....
WAIT! It was only me.... Ah, well...}

With the tiniest of drops, I accented my color at the base of the shamrock...
{If your petal begins to look thin, you can amend MORE dimensional adhesive
directly to the weak spot.... By THIS point, in my travels, however,
these leaves were pretty strong... }

I blinged up the center of the shamrock with these FABULOUS Want2Scrap self-adhesive gems. Using four at the base, I adhered these with the adhesive that is already attached to each, breath-taking, little gem. For the fifth, CENTERPIECE of bling, I added a small pool of clear adhesive in the center of the bottom layer, and then just "topped off" my bling pyramid. The extra adhesive provided some good stabilization.... I think this thing is READY to bring some SERIOUS luck! And RICHES! AND prosperity ....

FOR US ALL!

Thank you, SO much, for joining me today! I hope you found some "happy" right here!
Don't tell the Leprechaun, {or maybe he KNOWS already!}
but the brightest pot of gold
can be found in my handsome stash of Want2Scrap BLING!
If you haven't treated yourself, I say, "BLING IT ONNNNNNNNNNNNNN!"
I sure hope you enjoyed this little creative journey with me...
Have a super sparkly day!


 Hello everyone, this is my first post and I am so excited to share a cute card I have created using the Fleur De Lis rectangles from Spellbinders
  I had so much fun making this card, I wanted to make something with Spring in mind, I started with blue card stock for my card base, then covered with patterned papers, and I cut a piece of white glittered card stock, I added the glittered card stock on the front of card , added one sweet vintage image, some flowers, ribbon and buttons I also distressed the edges of the card and image.
 I wanted to add more interest on the glittered card stock so I use my fingers to lift a little bit the edges of the scallops... Love the result! hope you enjoy my first project, I can't wait to share my next creations with you.


