Tuesday, June 19, 2012

You make me smile

Hey all, AJ here with a card today using some Baby Bling Pearls in White.


I think these are my go to Want2Scrap product!  I love using them for adding quick and special touches to my cards.  My card today uses the new Carta Bella line and Gina K Stamps.  I stamped the image and sentiment with ClearSnap's Colorbox inks (LOVE those! ;) and added the baby pearls on before adhering to the card front.


Want2Scrap Products Used:
Baby Bling Pearls in White


ClearSnap ColorBox inks in Citrine and Wicked Black
S4-130 Classic Rectangles SM; S5-025 Labels Seventeen, Spellbinders Dies
Carta Bella Patterned paper; Beautiful Moments
Gina K Stamps- Hello Sunshine
E-Z Runner tape, 3D Foam Squares; Scrapbook Adhesives by 3L

enjoy!!
AJ

Monday, June 18, 2012

Old Time Tricycle Silhouette: Friends (Nina)

Hi, friends. It's Nina here again with my 2nd card using the Want2Scrap Silhouette - Old Time Tricycle. As with my first card, I used the silhouette as a stencil. I just love the results, which give the illusion of multiple layers, esp with that collage patterned paper by Prima.
W2S-Card2
I layered the card front with Want2Scrap Manilla tag which was stamped with The Craft's Meow's Simply Delightful stamp set. I added small banner strips from paper scraps on top of that. The sentiment is Want2Scrap Chipboard Sentiments- Words of Love covered in white pigment ink. A vintage brad and some Want2Scrap Swirls, Finesse - Silver Rhinestones - 2 Pack - Self Adhesive finish the card.
W2S-Card2det

I have two more cards to show you using the same silhouette shape. In the meantime, enjoy your day!

Want2Scrap products used:

Cross Promo Products used:

Come visit me on my blog, Crafting in Croatia.

Sunday, June 17, 2012

Making an envelope from vintage sheet music for your dimensional cards

Hi there!  Dana back with how to make a quick and beautiful custom envelope to house your dimensional cards. 


Remember this vintage postacard inspired card from yesterday???


That flower alone has it's own zip code so I set about making a pretty envelope to contain my card.


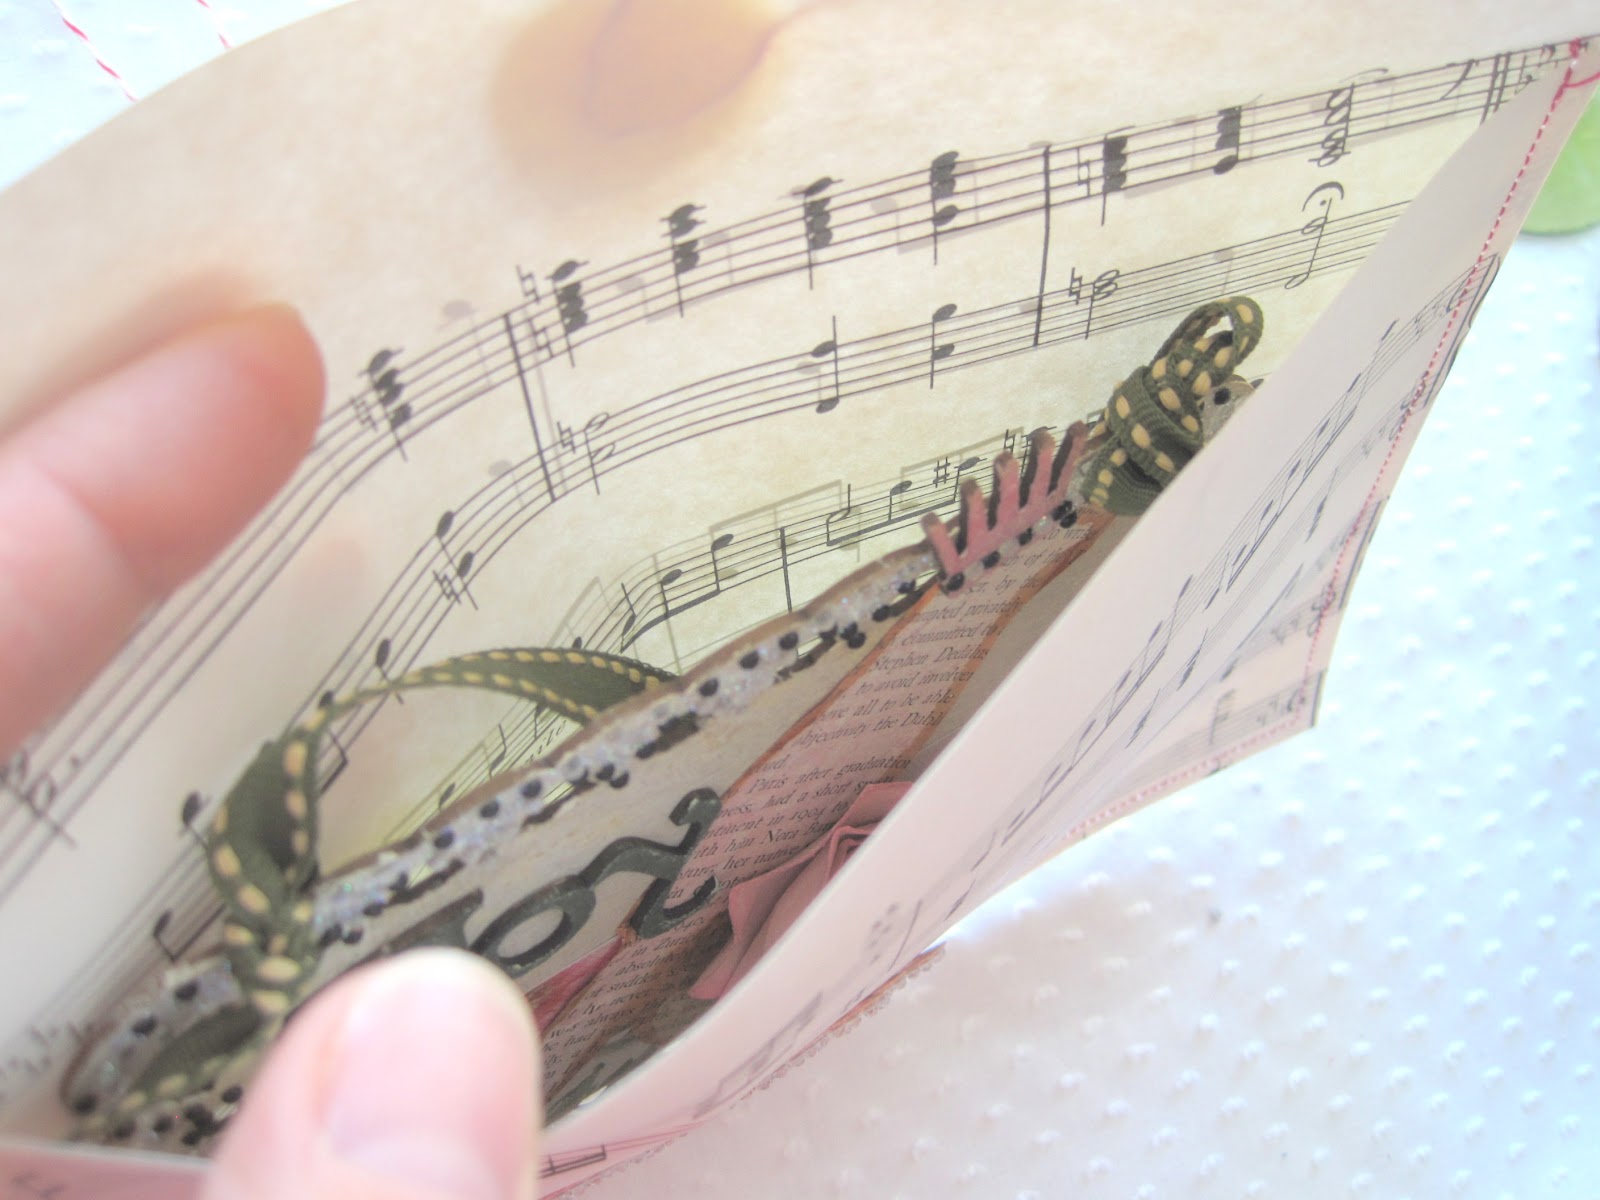
I cut a 7.5" x 12" piece of vintage sheet music paper from a book I have for crafting purposes.


I then folded the bottom of the paper up to within 1.5" inches from the top of the sheet leaving the remaining overhang to serve as the flap of my envelope.  You can leave the edges of the flap straight as they are above or trim at an angle like I did on my finished project.


Using a sewing machine, I stitched with a lively contrasting thread in a raspberry color to close the sides of the envelope and along the bottom just for detail.  Ta-dah!  An envelope is born!


This pretty sheet music paper begs to be embellished with more pretties like the Nestabling Fancy Tags Two Silver Rhinestones over the matching fancy tag die cut from Spellbinders.


Continuing the yellow button and and paper flower with 72 Count - White Pearls - Self Adhesive center that the recipient will find on the card inside I was able to craft an anchor for my string closure of the envelope.  A strong glue like 3-in-1 Advanced craft glue from Beacon Adhesives will provide a secure hold for the button closure.


Simple, fast and elegant!  A custom envelope that is a treasure all by itself and will look lovely adorning the top of your gift package. 

Thanks for coming by!


Want2Scrap® Supplies Used:

Cross Promotional Products Used:
 
Other:
Paper: vintage sheet music and Papertrey Ink
Stamps: My Favorite Things
Button: Buttons Galore and More
Ink: Papertrey Ink and Stampin Up!
Mist: Tattered Angels
Other: baker's twine

Saturday, June 16, 2012

Making a 3-D "postcard"

I love vintage postcards!  There is something so delish about them and how rich and full of details they are.  Today's project is about recreating the look and feel of a vintage postcard but letting a few of the elements truly "pop" from the page...join me, won't you?

I started with Nestaboard Lattice Rectangles and painted it with white acrylic paint from EcoGreen and swiped on Clearsnap Colorbox ink in yellow ochre.  I also used a Bird on Branch die cut as a mask on vintage bookprint.  I sprayed different mists over the die cut including Caramel Latte Smooch Spritz from Clearsnap.  This mist was also used on the dimensional flower I made using the Dahlia die from Spellbinders and embellished with a button and 72 Count - White Pearls - Self Adhesive in the center.


The Chipboard Sentiments- Words of Love provided me with the perfect scripted word "joy".  This chipboard is easily embellished using Colorbox Chalk ink, white acrylic paint and Baby Bling Pearls White - 100 Count - 2.5mm.


This "postcard" is edged in Nestabling Lattice Rectangle Black & Silver Rhinestones that has been sprinkled with Sugar Shimmer from Donna Salazar.  The bird and branch has been embellished with a crown from the Designer Embellies - Mixed Media Elements (2 - Pack) and Clearsnap Smooch ink in lettuce on the leaves area of the mask.

The back of my "postcard" has been adorned with a simple graph designer paper and a postage inspired stamp.  Thanks so much for stopping by!  Come back tomorrow for a tutorial on how to artfully package a card like this...hope to see you then...

Want2Scrap® Products:

Cross Promotional Products:
EcoGreen Crafts Acrylic Paint Tubes in white
Clearsnap Smooch Spritz in caramel latte
Clearsnap Smooch Inks in lettuce and taffy
ColorBox Fluid Chalk Ink from Clearsnap in yellow ochre and rouge
Sugar Shimmer glitter from Clearsnap

Other:
Buttons from Buttons Galore and More
Papers: October Afternoon, SEI, vintage book print and Papertrey
Stamps: Papertrey ink
Ink: Stampin Up
Ribbon

Friday, June 15, 2012

Want2Scrap Message Board


One of the perks of playing with all wonderful goodies from Want2Scrap is also getting to play with the fun product from other manufacturers such as Nikki Sivils, Scrapbooker. I am not newbie to Nikki Sivils, Scrapbooker. I was proud to be on her DT for 2 1/2 years and it was especially fun for me to work with one of her fantastic new lines.

I decided to make a little message board for my kitchen.


I simply made the canvas and added 2 sizes of Post it Note pads to write the memos on. I created lots of texture by mixing paint from Eco Green Crafts and Light Modeling Paste. I used a craft stick and adhered it over a punchinella mask.


Now the 72 Count Brown Rhinestones and the LeCreme Baby Pearls were the perfect center for each rub-on flower.


The Chipboard Embellishments - Style C were easy to dress up with spray ink, paint and pearls. I also added the Finesse LeCreme Pearls Swirls. 


Want2Scrap Products:

Cross Promotional Products:
Nikki Sivils, Scrapbooker (Messages) - Pattern Paper, Punch Outs
Clearsnap - Stamp

Other Products:
Paint- Claudine Hellmuth
Decopage-
Light Modeling Paste- Liquitex
Spray Ink- Tattered Angels
Ink- Staz On
Rub-Ons- Kaiser Craft

Thursday, June 14, 2012

YES IT IS....Another FANTASTIC Want2Scrap Sale!!


COME and get your and stock up! WHAT a Deal! Happy WEEKEND early from all of us at Want2Scrap.

Blow Me Away!


Hi again!  I'm happy to be back with you today to share another layout!  This one is a very recent creation, and a I chose a photo of my son, shortly after his 5th birthday, playing with one of his gift- a bubble blower from Grandpa and Grandma.  If you ask him, he'll tell you "It's bubbles within bubbles!"  And it is!  A pretty cool little invention.

I used Want2Scrap™ Nestaboard, pearls, tags, and more on this page.  I really enjoy the effortless layering that these products allow me to do.  The denim is one of the newer releases, and I find it a perfect complement to so many of my projects.


Want2Scrap™ Products used:
Petite Scalloped Circles Nestaboard
Manila Tags
Steel Blue Pearls
Denim Designer Embellies

Partner Products:
Glue Arts Extreme Tac Tape Runner

Other: Crate Paper Toy Box Collection

LinkWithin

Related Posts with Thumbnails
Pin It button on image hover