Wednesday, August 31, 2011

Guest Designer - Lori Craig - Carpe Diem

I can't believe I'm at the end of my Guest Designing month with Want2Scrap™. I've assured Miss Heidi that's not the end of my Want2Scrap™ consumption. :) Thanks so much to Michele and her fabulous team for inviting me to share with you this month. I've loved it!


For my final project, I wanted to show a framed layout that I put together after a fabulous trip to New York City earlier this month. One of my dearest friends, Jenn Balcer, and I had the opportunity to take Manhattan by storm for 4 full days...and we made the absolute most of it! Sightseeing! Shopping! Eating! Seeing Wicked! The Crown of the Lady Liberty! The Empire State Building! With lots of open time, we were able to seize the days! It was truly a fabulous trip! This is a photo was taken at the top of the Empire State Building at midnight.


I knew I wanted a monochromatic finish to my project, so I started with one of my signature looks, kraft cardstock, and applied aqua acrylic paint over a space just larger than my photo. Then I applied the same acrylic paint over the edges of my black and white photo. I cut my dies with Spellbinders™ templates and adhered the paper die cuts to the Nestaboard™ with liquid adhesive. All of my rhinestones were colored with Copic marker and then the elements were layered onto my picture and adhered with foam adhesive.


Tip - Coloring Want2Scrap™ rhinestones with Copic Marker is easy since the alcohol based ink will adhere to virtually any non-porous surface. While bling is still on manufacturer packaged acrylic sheet, lightly skim color over the top of silver bling with the side of the brush tip on the Copic Sketch (or Ciao). This will let you apply ink over top of the bling embellishment very quickly without applying ink to the clear adhesive of the design. You should probably select a color of marker that is a shade or two *darker* than your desired color, and always test an inconspicuous rhinestone before coloring final embellishment.


Want2Scrap™ Supplies Uesd:


Lori, thank you so much for being the Guest Designer for Want2Scrap™ during the month of August!! We have loved seeing your designs and the how you have used Want2Scrap™ products to embellish your projects. Your projects have been amazing and I love your framed art!! To see more of Lori's beautiful artwork please be sure to visit her blog--Make a Difference.

Thank you so much for stopping by the Want2Scrap™ blog today and I hope you have a sparkling and creative day!!

Hugs,

Tuesday, August 30, 2011

Tag You're It!

Tag You're It!! I love making hand made gift tags and today I have a few pocket gift tags to share with you. I created these adorable pocket gift tags using Nikki Sivils Scrapbooker collection of papers, Beatrice, We Are Family and Summer. I hand cut several small pieces from each collection to create the tags. The We Are Family tag used the amazing Nestabling™ Beaded Square Black Rhinestones, Nestabling™ Beaded Square White Pearl and the Nestabling™ Scalloped Hearts White Pearl from Want2Scrap™
The tag inserts are approximately 2 3/4 x 2 3/4 and they fit nicely inside the pocket as seen above.
For this pocket tag and insert, I used the Beatrice collection from Nikki Sivils Scrapbooker I hand trimmed all the little pieces and adhered them with Beacon Adhesives Zip Dry™ and foam squares. I added 72 Count Hot Pink Pearls, 72 Count Hot Pink Rhinestones and Nestabling™ Scalloped Hearts Pink Rhinestones from
The last pocket tag and insert was created using the Summer Collection from Nikki Sivils Scrapbooker, this cute Summer tag has Nestabling™ Beaded Square Silver Rhinestone and 72 Count Baby Blue Rhinestones from Want2Scrap™

Thank you for stopping by my blog post and I hope you are having a fantastic week so far, make sure to check out all the amazing creations from the design team right here or see some of the creativity from the girls from Splitcoast Stampers if you are a member on their site Crafty Smiles,


Monday, August 29, 2011

Last Days of Summer Blog Hop Winner!

We want to thank so many people for participating in our blog hop, we hope you had as much fun as we did! Now to find out who the lucky winner is hop on over to the PSA Essential Blog and see if you are the lucky winner!


Sunday, August 28, 2011

Want2Scrap™ Necklace

If you have not heard be sure to check out the blog hop going on here for your chance to win over $300 in fun scrappy products!

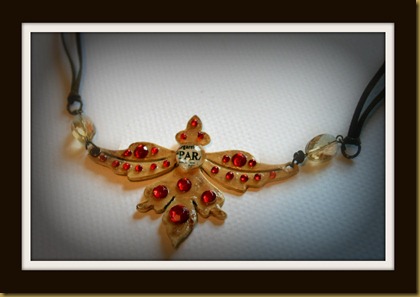
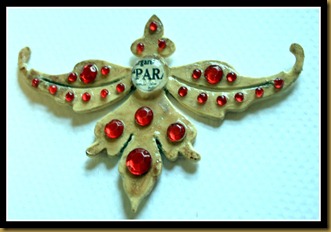
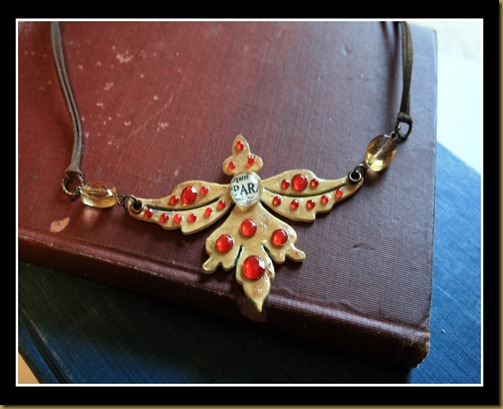
Every girl needs an beautiful necklace for that evening out. I used some of my wonderful Want2Scrap™ products to create a fantastic necklace for an evening out.

1aa

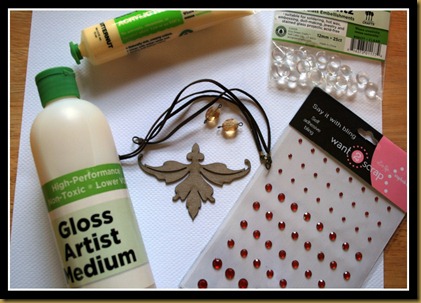
I started by gathering the supplies I would need to create my necklace. You can see the complete list of supplies at the bottom of the page.

w2sa1

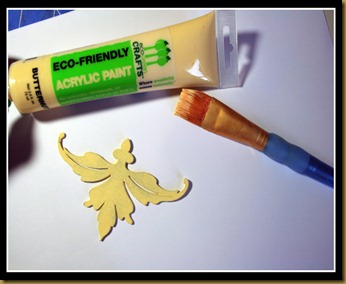
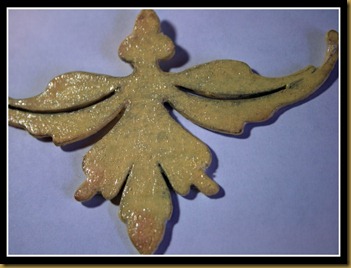
I painted my Want2Scrap™ Chipboard Embellishment Style A with Acrylic Paint Tubes by Eco Green Crafts.

w2sa2

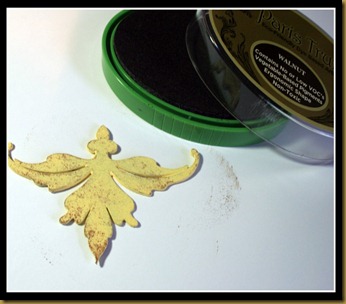
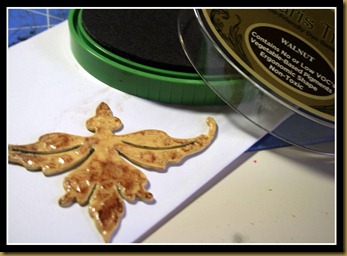
Then inked the painted chipboard with Eco Green Crafts Paris Trunk™ Dye Ink – Walnut and sealed with Beacon Adhesives™ LIQUID LAMINATE.

w2sa3
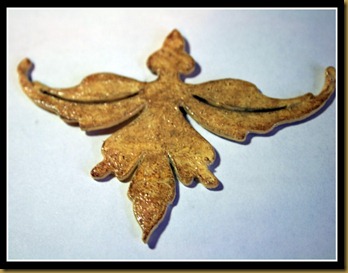
I then used a crackle medium to give the piece an aged look.
w2sa4
I then added more Eco Green Crafts Paris Trunk™ Dye Ink – Walnut to the crackled chipboard.
w2sa5
YUMMY!
w2sa6
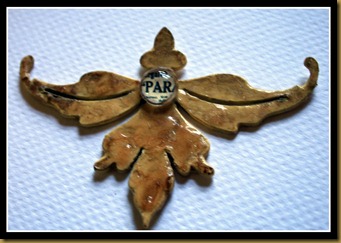
I cut out a circle from Graphic 45 paper and glued a Eco Green Crafts Glass Glintz™ - Clear 12mm over the top forming a bevel.
w2sa7
I using Eco Green Crafts Gloss Medium I painted on a semi thick coat and laid on my Want2Scrap™ 72 Count - Red Rhinestones - Self Adhesive

w2sa8

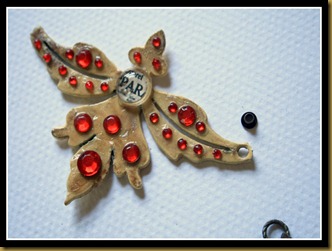
I added eyelet to each side after cutting off the edge swirls of the Want2Scrap™ Chipboard Embellishment Style A

w2sa9

Then using a recycled necklace, I attached a bead at each end and then attached the beads to the faux leather necklace.

w2san

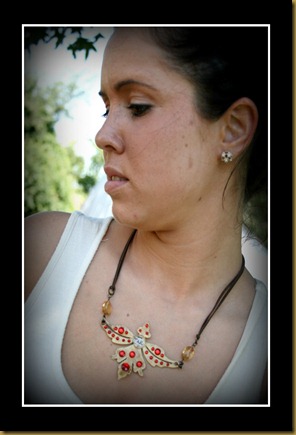
It is vintage and stunning…love the look. You can wear this with a dress for the evening or a pair of shorts and a tee-shirt during the day for a great look.


aaaa

I just may have to make a few more in different colors….a girl can never have enough bling!

Want2Scrap™ Supplies Used:

Chipboard Embellishment Style A
72 Count - Red Rhinestones - Self Adhesive

Cross Promotional Products Used:
Eco Green Crafts: Acrylic Paint Tubes (Butternut), Paris Trunk™ Dye Ink – Walnut, Glass Glintz™ - Clear 12mm and Gloss Medium.
Graphic 45: Le' Romantique Collection
Beacon Adhesives™ LIQUID LAMINATE

Other and Misc:
Crackle Medium: FolkArt® Crackle Medium, Eyelet, Zutter - Rivet Setter Hammer Rivet Setter Hammer, and yard sale jewelry.
Thanks so much for joining me today. I hope you have a wonderful week and until next time…BE CREATIVE!

dtsig-karen-wbg (1)

Karen Taylor

Saturday, August 27, 2011

Niceties of Nestaboard!

If you have not heard the Last Days of Summer Blog Hop is going on, be sure to check it out here. You don't want to miss a chance to win the grand prize valued at over $300.

Have you played with Want2Scrap's new line of Nestaboard™ products?

If NOT, {*pssst!*} I have something to tell you... THEY'RE AWESOME!


Definitely, definitely, definitely something to say, "YEEE HAWWWW" about!

And, you're not seeing things - THIS was the book from my recent post, here!
I had a rompin' time at the rodeo, THAT day! Embellishing the OUTSIDE of
this wonderful album was SUCH a hoot! I had quite the time creating the
ultimate faux wood-grain, with paint and gel medium from Eco Green Crafts™!


But that was THEN, and now is.... time to HEAD on, inside... THE ALBUM!


PICTURES! Let's start with the RAW materials that make, so much of
our WONDERFUL sport, soooooooo much FUNNNNNN! {I mean, the
name of the company is "Want2Scrap™" ~ yes, please. I REALLY DO!}


I'm writing this post, in particular, for my peeps out there - YOU might be one...
Scrappy phobes: YOU LOVE IT! YOU NEED IT, YOU WANT IT... but then, in
the midst of the collecting and curating... and all of the fun reading, researching
and planning - uh, you HAVE A HARD TIME GETTING STARTED! I'm your
s-i-s-t-e-r! Hang on - I'm going to hold you, and rock you, and ENCOURAGE
you... {Oh, and ME, too!} Let's LET go of our worries - and just MAKE AN
ALBUM! If you HAVEN'T ventured into the land of NESTABOARD™
/GRAND ALBUMS, honey, babies, sweethearts ~ come with me!
There is MUCH, much freedom to be had!


Grab some pictures - THEY don't have to be the best ones
you've ever taken! In fact, if you're suffering from "Scrapper's block"
just grab the closest pile you can find.
{Okay - it really helps if they are at least of similar subject,
but anything to get you going - is a good thing!}
Sometimes just grabbing a few off the fridge
can be an excellent way to get your groove on, just sayin'!}

Organize the photos in a way that pleases you, and merely set
them between the pages of your Want2Scrap™ album -
THERE ARE SO MANY SHAPES to choose,
so BUY THEM ALL,I say! And then just start with one... hee hee
Don't worry if you have TOO many photos, just organize 1 - 5 pictures
per page, if you have that many,
and then start stacking them in....

Next, select a small sampling of papers that coordinate
FOR YOUR NEEDS of color and theme!


Without straining your noggin, start cutting pieces of designer paper
to fit your page. {Don't worry! - YOU'LL be FINE!}
If your album has decorative edges and you are WITHOUT a
coordinating die, carefully burnish the edges of your paper to
the edge of the Nestaboard™, then trim along the crease.

{You're FINE! Just LET GO and play!}


By limiting your paper choices, you can work quickly. Attach paper and
photographs though out the album. Inking or sponge painting the edges
of each page can hide a multitude of sins...
{Love me some brown ink, BABIES!}


Each time a page is covered, re-punch the holes of the album.

Working with the same basic colors and designer
paper will allow you to work quickly through out the book.

As you plan your photo placement, to coordinate with the pages
of the book, you may have "extra" photos in a series. Plan to
feature the main photos to tell your story, but a series of shots
along that road, may be added in unexpected {and FUN!} ways!


My album, about my kids "riding solo" when they were rather small,
is the main premise of my book, but the shots of my wee-gal, properly
"thanking" her horse, could ALMOST be an album of their own....
HOWEVER, board books can support a "heavy load" so watch what
can be added under that flap with the smiling cowgirls!


Starting with the bottom photo, arrange so that each picture will
face the viewer when the flap is lifted, like the pages of a book, if
you opened it, side-down. Photos will be attached back to back,
so learn to plan the order correctly, and this will become a fast and FUN
way to pack your album with ALL kinds of fun memories, pictures,
memorabilia and GREAT supplies!

Working two at a time, starting with the bottom photo, and then
the NEXT photo in order... {you should have 2 photos facing each other}
run photo safe tape along the top length of the second photo and
secure it, smoothly to the back of the bottom photo. See below:

{You should have created an "A" shape, with the photos facing}

Repeat that step with the next two photos, and then secure the
stacks between the two backsides of the photo paper....


Create a tab with a magnetic closure, to keep your stack of photos shut.


Using craft magnets, glue a magnet into the card stock tab.


Then cover with another piece of card stock,
so that the magnet will not be seen.


Plan for placement of the photos on the page and then with the opposite
magnet {positive + negative} , find the coordinating spot to glue the
second magnet. Mark spot with pencil. Glue magnet. When dry, cover
with tape and then designer paper, before adding photo stack, with
corresponding magnet closure. {We'll come back to that, shortly!}


Once you have the basic paper and photos down -
THE REAL FUN BEGINS!


EMBELLISHING! MORE great news about Nestaboard™ books:
the freedom to add LOTS of embellies - with little concern about
thickness! Just WAIT until you see what we can DO with a little
Want2Scrap™ bling! {The Electric Cowbow ain't nothin'!}


Because there's no binding, the pages can float over our heavy
accessories! HERE'S the shot of our first photo enclosure....
Note the AWESOME Nestabling™ rhinestone circle! Meow!


"Howdy Cowgirl" is RIGHT! Just look at the cuteness under here!


That's my girly-girl kissing her lovely horsie friend, Lacy, to
thank her for a good ride! SEE what I mean! We couldn't
omit THOSE photos! THINK of Nestaboard™ books like
"busy books" for US! Peek-a-boo SCRAPBOOKING!
*Swoon!*


LOTS of room for BLING!


Here's another one - same design, on the opposing page! CUTE, cute!


Love how my blingy swirls "point" to the hidden photos!


So fun and easy to add this WONDERFUL cowgirl, from
some CHAPSTICK packaging, given to me by our OWN
Dana G - aka Paper Daydream!
I turned the package into an embellie/page - SO easy to just punch some
holes and add her to this album! Love the odd size for visual excitement -
and just LOOK who is on the back... {My GIRL!}


Because THAT was so fun and easy, I stitched some photos and
glued them together - punched a few matching holes - LOOK!


I love the mis-matched layers! { Want2Scrap™ HAS a board book
where you can play with odd sized layers, where the work
is all done! All you have do do is add photos, etc. AND with
the ring closure, you can ADD stuff to your heart's delight!}
So MUCH fun!


No paper, at all on this page. Just pictures and a great sticker for FUN!


THEN, I made an envelope pocket out of some designer paper!
Folded it to match the basic size of the pages, dressed it up,
punched some holes and stuffed... wait for it.... MORE PICTURES
inside! YOU could also add journaling, memorabilia, ETC. to this
pocket, SO easily! I'm telling you friends - I'm taking a break from
page PROTECTORS - board book scrappin' is WHERE it's at!


*GASP!* Look at THAT posse -o- cowpokes! Made by Want2Scrap™!
Not even kidding! We have SO many fantastic laser cut pieces in the
store
! TOTALLY affordable, detailed and READY to use! I love the
intricacy of these guys! CHECK out our huge selection!


And, DON'T MISS our NEW brown finesse swirls! OMG!
I feel like I have died and gone to BLINGED-out HEAVEN!


I love dressing up the rings of the book, when complete.
Super way to get your fix of bows and charms! WATCH
me go! SO fun! But speaking of fun? Are you on BOARD!?!
{Get it?} - I sure HOPE so! I can't WAIT to see, if you do!


THANK YOU, sooooo much for allowing me to share
my love of this fantastic "sport" and the BESTEST
place for WONDERFUL bling, scapbooks AND so
many, many things, in between! {!} WANT2SCRAP™
never, ever disappoints! I hope you'll "board" our
train... {hee hee} NESTABOARD™ leaves me feelin' no pain!


Want2Scrap™ Products -

Grand Chipboard™ Album - Large Labels

Nestabling™ Labels One - Silver Rhinestone
Nestabling™ Heart Circles - Black Rhinestone
Nestaboard™ - Labels One
Swirls, Finesse - Silver Rhinestone
Beautiful Bling Strips - Black Weave
Cowbow Riders - Title Strip
Barbed Wire - Package of two

Cross Promotional Products -

Designer Paper - Graphic 45 Domestic Goddess
Eco Green Crafts - Acrylic Paint, Artist Medium, Green Glue, Walnut Die Ink

Additional Products -

D/P - Cosmo Cricket; October Afternoon; S/U!
Sentiment/Western Stamps - Waltzing Mouse Stamps
Additional, assorted Western Stamps - Inkadinkadoo, S/U!, Adorn-it
Solvent Based, permanent black ink - StazOn
Chipboard Stamps - Melody Ross
Stickers/Printed Chipboard - Cosmo Cricket
Twine - Beverly's
Charm - Michael's
Fabric - Making Memories

Other-

Wrapping Paper Scrap - Stash
Small chipboard scrap - Stash
Seam Bias - Stash

LinkWithin

Related Posts with Thumbnails
Pin It button on image hover